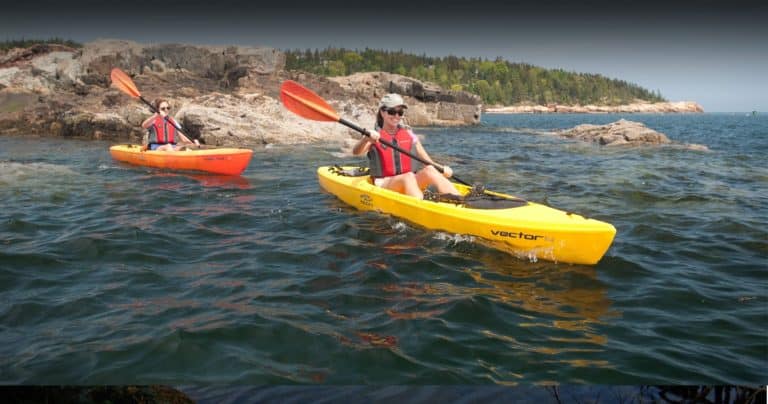
When you own a kayak, you’ll need an easy way to transport it. Loading your kayak on top of your vehicle allows you to explore new waterways and build your skills in different kayaking situations.
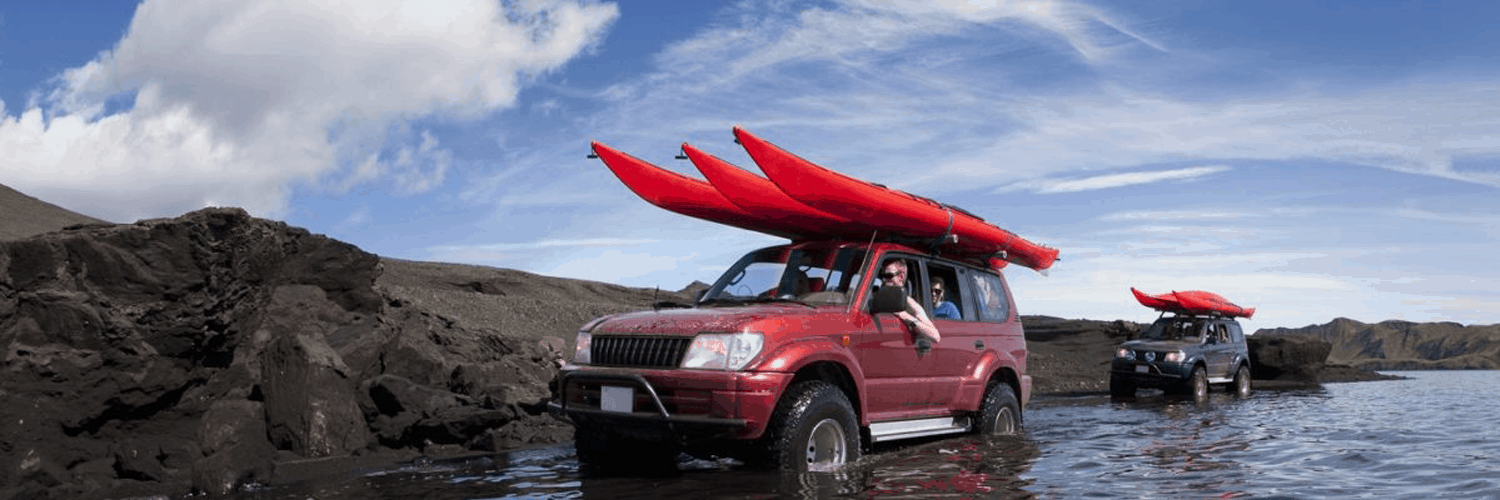
There are many different routes you can go to safely transport a kayak. From pulling a trailer loaded with larger kayaks to getting an inflatable kayak that can pack into the back of your car, you have many options to choose from.
For those that choose to go with a rotomolded kayak, you probably won’t be able to fit it inside of your vehicle. Installing a J rack on the roof is one of the easiest and most affordable ways to transport your kayak.
Although J racks are one of the simplest methods for kayak transportation, they still require proper installation of the rack, as well as your kayak itself.
That’s why we’ve compiled this comprehensive collection of J rack installation tips and pointers on how to load a kayak on a J rack.
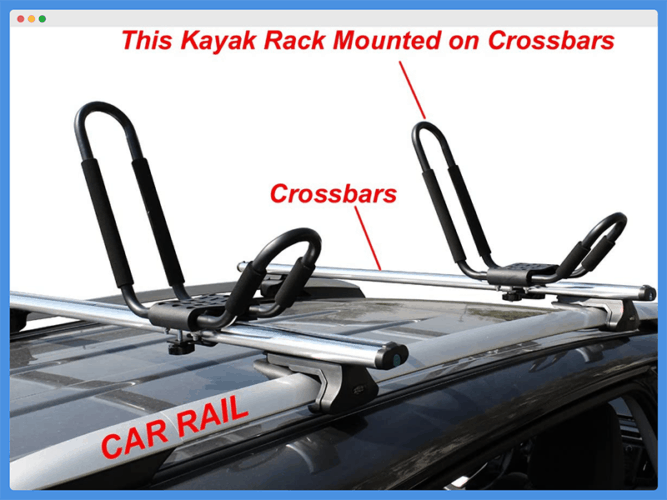
What Is A J Rack?
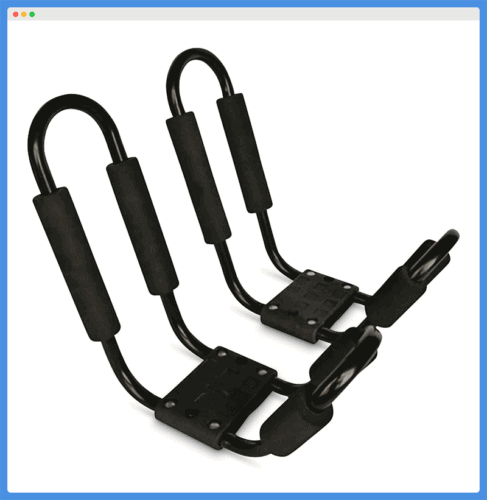
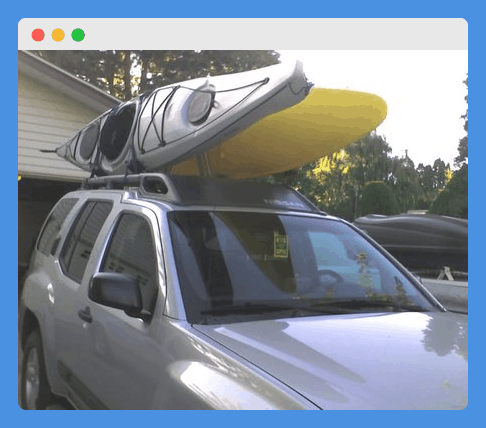
As you might expect, this type of rack gets its name from its iconic J-shape. You’ll need existing crossbars on your roof in order to install J racks, but once they’re in place they provide secure housing for your kayak to sit inside.
While J racks don’t come with a way to strap your kayak down, they do reduce drag by housing your kayak at an angle. This can eliminate the risk of heavy wind gusts lifting up the nose of your kayak if it was stored upside down on your roof.
Perhaps the biggest benefit of a J rack is the cost. This rack type easily ranks as one of the most affordable rack options on the market and J racks are also really easy to use, which we’ll get into in more depth in later sections.
Other Kayak Rack Types
In the interest of providing some other options, however, we’re going to briefly touch on a few other types of kayak racks for vehicles, including hitch-mounted racks, pads, V-shaped racks, and others.
Pads
One of the easiest DIY kayak racks solutions is to use pads. They work best for vehicles without existing crossbars or a roof rack and they don’t require any hardware or permanent installation.
You can choose inflatable or foam padding and you’ll simply need to make sure the pads are wider than your kayak. Set the pads on your roof and set your kayak on top of the pads before strapping the kayak down.
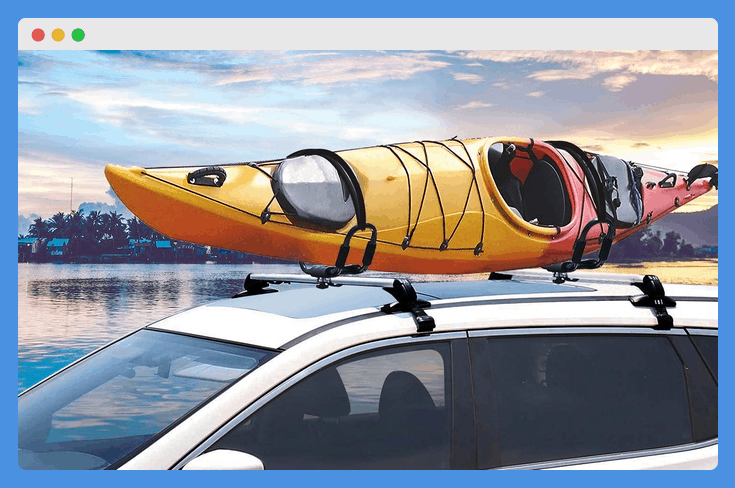
Crossbars
If you already have crossbars on your vehicle, you can easily strap a kayak right onto those bars. You can also get crossbars if you don’t already have them, but make sure that you choose crossbars that are compatible with your vehicle.
Always make sure to flip your kayak over and set it face down on your crossbars. This will make it easier to tighten down the straps that should run over your kayak to keep it in place.
Hitch Mounts
Hitch mounts are a great option for trucks. They allow you to place one end of the kayak on top of the truck’s cab while the other end is supported by the crossbar of the rack.
The most common models of this rack type are compatible with a standard two-inch truck hitch. Many of them also have adjustable vertical supports that allow you to customize the height of your setup according to your vehicle’s specifications.
V-Shaped Racks
Like J racks, V-shaped racks require that your vehicle already has crossbars or an existing roof rack. These are an affordable option that also requires very little time for proper installation.
These racks are designed for your kayak to be installed face up. The V-shape of the racks is designed to hold the keel of your kayak and it makes it very obvious where you should place your kayak when putting it up on your roof.
J Rack Installation Tips
Now that we have a better understanding of what a J rack is and how it differs from other kayak racks, let’s quickly cover some tips for properly installing a J rack on your vehicle.
Vehicle Type
The first consideration for installing a J rack is the type of vehicle you have. This rack type is best for smaller cars, trucks, and SUVs because you’ll need to lift your kayak up to the height of your roof to get it on the rack.
While they’ll work on a truck, higher vehicles generally make it more difficult to use a J rack. Additionally, the vehicle you choose to install J racks on will already need to be equipped with crossbars or another sort of roof rack.
Orientation
All J racks will come with a higher side and a lower side. In between, you’ll find the flat, padded area where the gunwales of your kayak will rest once it’s on the rack.
Some people choose to install their J racks with the higher side facing out and away from the center of the vehicle. Most people that use this setup will then have to load the kayak from the rear of their vehicle.
That being said, we recommend installing your J racks so that the taller side is towards the center of your vehicle.
This makes it much easier to load your kayaks from the side of the vehicle, where you’ll have the ability to step up on the vehicle’s runner or into the doorway if you need extra height.
Security
If you live somewhere that security is a concern, consider opting for a J rack with a locking mechanism.
While models with a locking mechanism will be more expensive than those without, they are the best way to guarantee the security of your rack.
Tightening Your Racks
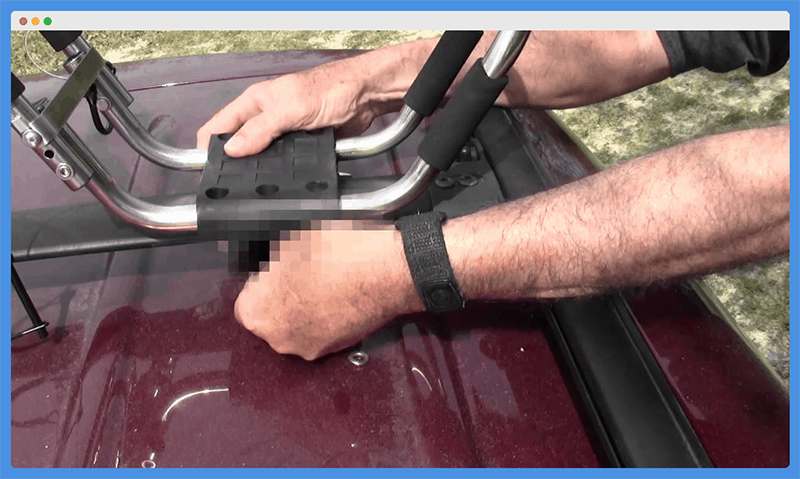
Fortunately, most J racks don’t require any additional tools or hardware for proper installation. This makes the process very easy, but it also means that you’ll have to tighten the screws on your rack by hand.
Depending on the setup of your vehicle’s existing crossbars or roof rack, this can prove difficult. But you need to make sure your racks are tightened enough that they don’t rotate on the bars of your roof rack.
Otherwise, you risk the entire rack rotating down while you’re driving, which would certainly compromise the security of any kayak that’s loaded on.
You may be able to use a pair of channel locks or large pliers to further tighten the screws of your rack, but you’ll need to be careful doing so in order to avoid damaging any of your rack’s components.
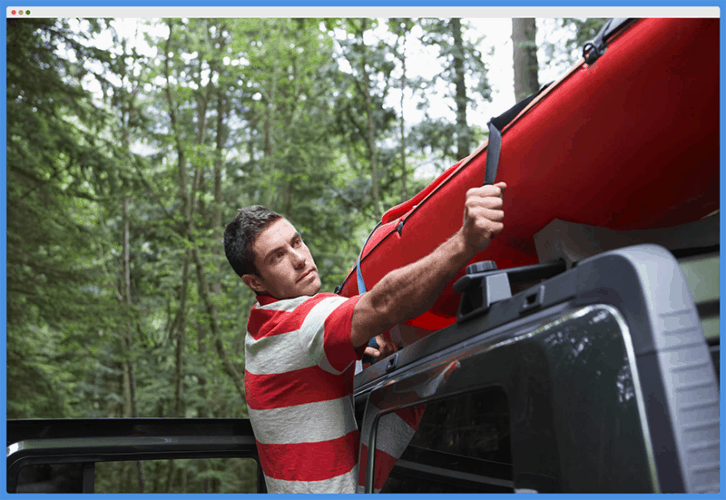
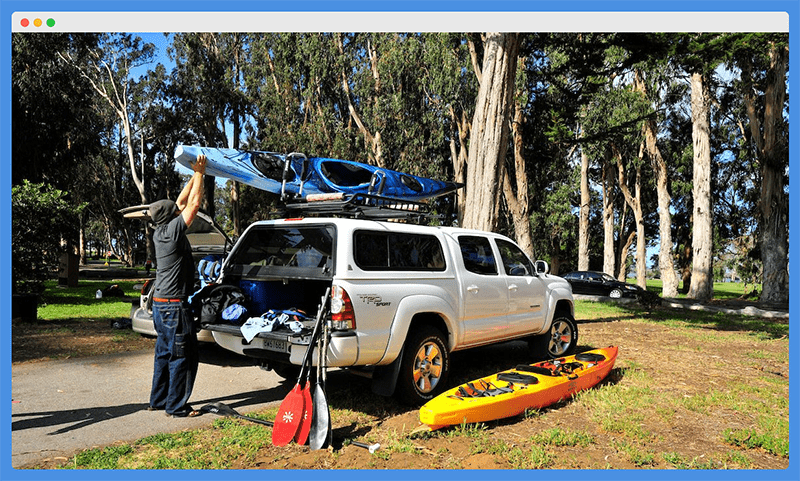
How To Load A Kayak On J Rack
Now that you have your rack secured, it’s time to get your kayaks loaded up. The proper loading process for kayaks will differ depending on the vehicle and rack type, but we’ll provide some useful recommendations for loading kayaks on a J rack.
Setting Up Your Kayak on the Ground
This is a simple step that’s often overlooked by new kayakers. The best way to make your life easier when loading kayaks onto a roof rack is to set up the kayak in an advantageous position on the ground before lifting it.
For example, those securing a kayak to crossbars should always start by flipping the kayak over so that it’s face down. This allows you to lift the kayak straight up and onto your car without having to flip it.
This also reduces the risk of losing grip and dropping the kayak, which can cause damage to the kayak or personal injury. When loading a kayak on a J rack, however, the best way to position the kayak on the ground is face up.
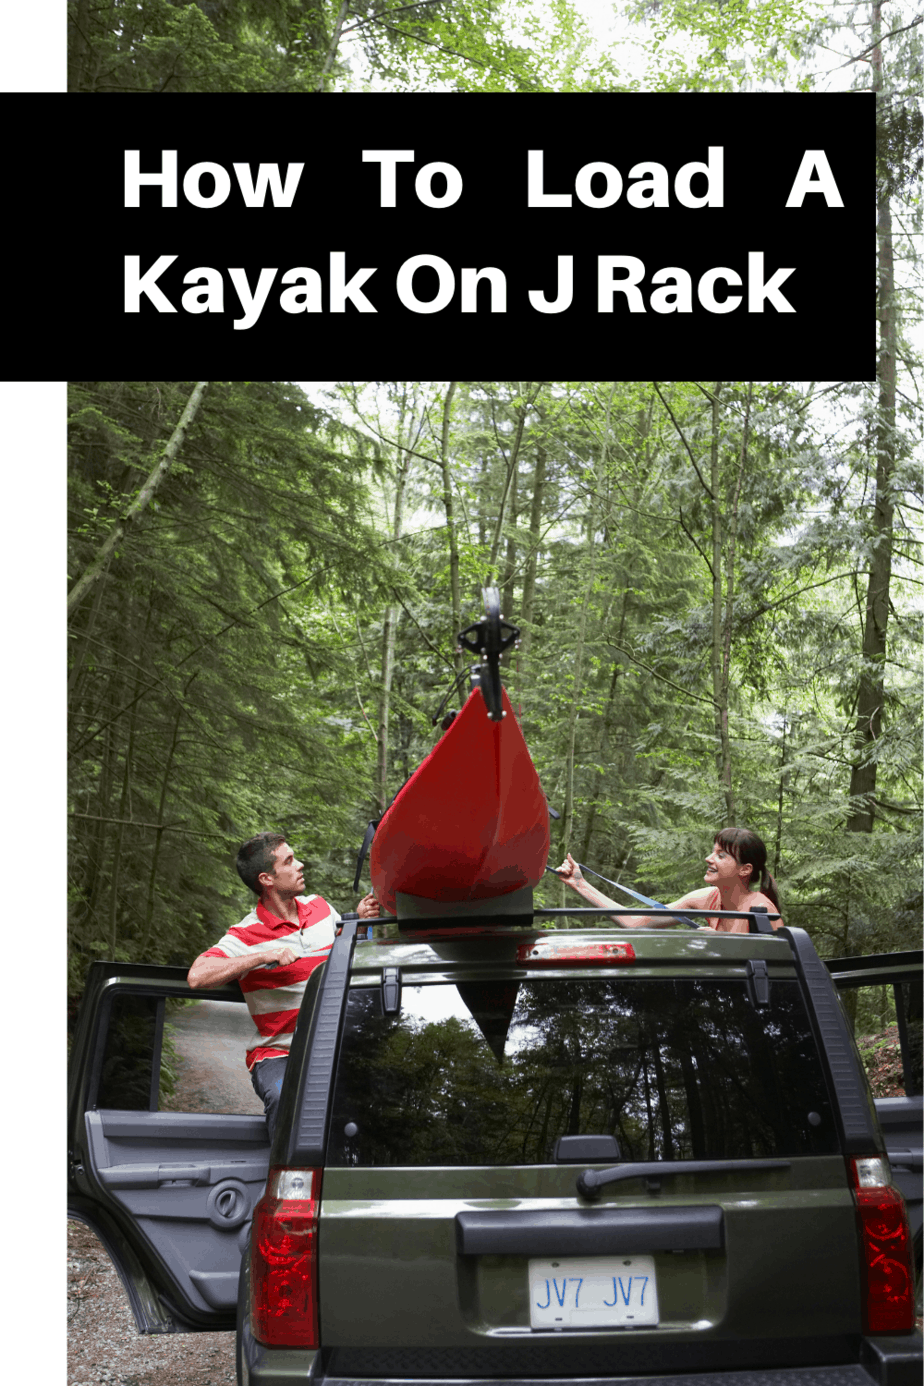
Loading From The Side
If you’re loading a kayak from the side by yourself, you’ll need to lift and rotate the kayak toward you as you go up. Depending on the size of your kayak, this can be a difficult maneuver, especially for smaller paddlers.
Loading kayaks onto a J rack from the side is easiest with a partner.
To get started, position yourselves at either end of the kayak (bow and stern). As you lift, you’ll need to coordinate rotating the kayak less than 90 degrees in order to set the gunwale onto your J rack.
If one of you is much taller than the other, it may be useful to allow the taller individual to set his or her end of the kayak into the channel of your J racks first.
With one end propped up, the taller individual can swing to the other end of the kayak to lend assistance in setting that end on the J rack.
Loading From The Rear
Loading kayaks onto a J rack from the rear is often the easiest technique for solo paddlers. It’s also a better alternative to loading from the side if you have a very lengthy or heavy kayak.
For this technique, you’ll also want to start with the kayak on the ground face up. Align the bow of the kayak just behind the bumper of your vehicle and place a pad (or pads) underneath the stern of your kayak.
This will protect the stern of your kayak from damage as you lift the bow up and into the channel of your J racks.
Because you’ll need to slide your kayak forward once you get the bow lifted high enough, it can be a smart move to position the pad two or three feet forward of the kayak’s stern.
The key to this technique is making sure that the bow of your kayak is securely set in the channel of your J racks before moving on to the next step.
Otherwise, you’ll risk the entire kayak sliding off the side of your car as you begin to lift the stern and push it forward.
Once you’re confident that the bow of your kayak is secure in the channel of your J rack, swing around to the stern. Carefully lift the stern as you push forward and rotate the kayak so that the gunwale sets into the channel of your J racks.
This rotation is key because getting the gunwale securely into the channel of your J rack will make it much easier to slide the kayak forward.
For a variation of this technique on longer vehicles, position your kayak at an angle to the side and rear of your vehicle.
This technique allows you to apply more force to push the kayak up and towards the center of your vehicle, rather than simply applying force parallel to your vehicle.
Using this technique can also reduce the likelihood of your kayak sliding off the side of your vehicle as you’re trying to get it set in place.
Securing Your Kayaks

Once your kayak is set in the channels of your J rack, you’ll need to secure it down before driving off. This is an area where many new kayakers fail, which can ultimately lead to disastrous consequences.
For starters, you’ll need a reliable set of straps to work with. If you’re only carrying one kayak on top of your vehicle, two straps will do the trick, but more will be necessary if you install a second set of J racks so you can carry two kayaks at a time.
Something like these 12-foot NRS Cam Straps should be enough to do the trick and they’re super easy to use. Of course, you can use other straps that you have lying around the house as long as you make sure they aren’t frayed or cut anywhere.
The easiest way to strap your kayaks onto J racks is from the side of your vehicle. If you’re smart, you can actually set your straps in place before loading your kayaks on.
To do so, wrap the strap around the bar on the taller side of your J rack. Let the straps around the rear J racks fall toward the back of your vehicle and vice versa for the straps around the forward J racks.
Then, set your kayak up and in place. From there, bring the straps up and over your kayak and down to the lower side of your J rack. And here’s one more important step that many folks overlook.
Instead of wrapping the other end of your strap around the lower edge of the J rack itself, run the strap all the way down and underneath the crossbar that the J rack is installed on.
This acts as a fail-safe and helps to secure your strap to a more trusted and sturdy location. Finally, position the clasp on the strap about halfway up the width of your kayak before inserting the non-clasp end through the clasp and pulling tight.
If you set up your straps correctly, you should be able to tighten them down by pulling toward you. If you have to pull away from you to tighten your straps down, it’s recommended to remove them and reverse the orientation.
This is simply because it will be much easier for you to tighten the straps down adequately when you’re pulling toward you. For a more detailed tutorial on cam straps, check out this video.
For additional security, you can use a cable lock to further discourage kayak theft.
This is easier if you have a sit on top kayak with scupper holes because you can run the cable lock through the scupper holes and around the crossbar on top of your vehicle.
If you have a sit-inside kayak without scupper holes, you might search around for a D-ring or another hardpoint on your kayak that you can run a cable lock through.
Otherwise, you can always look into locking cam straps if you live in an area where security is a more pressing concern.
Final Thoughts
Now that you have your kayaks loaded and secured on your J rack, take out your trusted map and figure out where you’re going to paddle next. As we mentioned earlier, J racks are a simple and affordable option for kayak transportation.
But before we wrap this up, we’d like to offer some final thoughts on J rack ownership. Whenever you attach something to the top of a vehicle, there’s a possibility that things will move around while you’re driving.
Therefore, it’s a good practice to stop and double-check your straps after just a few minutes down the road.
While it might be inconvenient, your kayak is more likely to shift immediately upon encountering that first 60 mile-per-hour gust of wind.
The only harm in stopping to check your kayak’s alignment and re-tighten your straps is a few minutes of delay. Also, make sure to regularly make sure your J racks themselves are adequately tightened on your vehicle’s crossbars.
A little regular maintenance goes a long way to help you protect your investments. If you ever suspect that your kayaks aren’t secure on your J racks, it is always recommended to stop and re-check your setup!