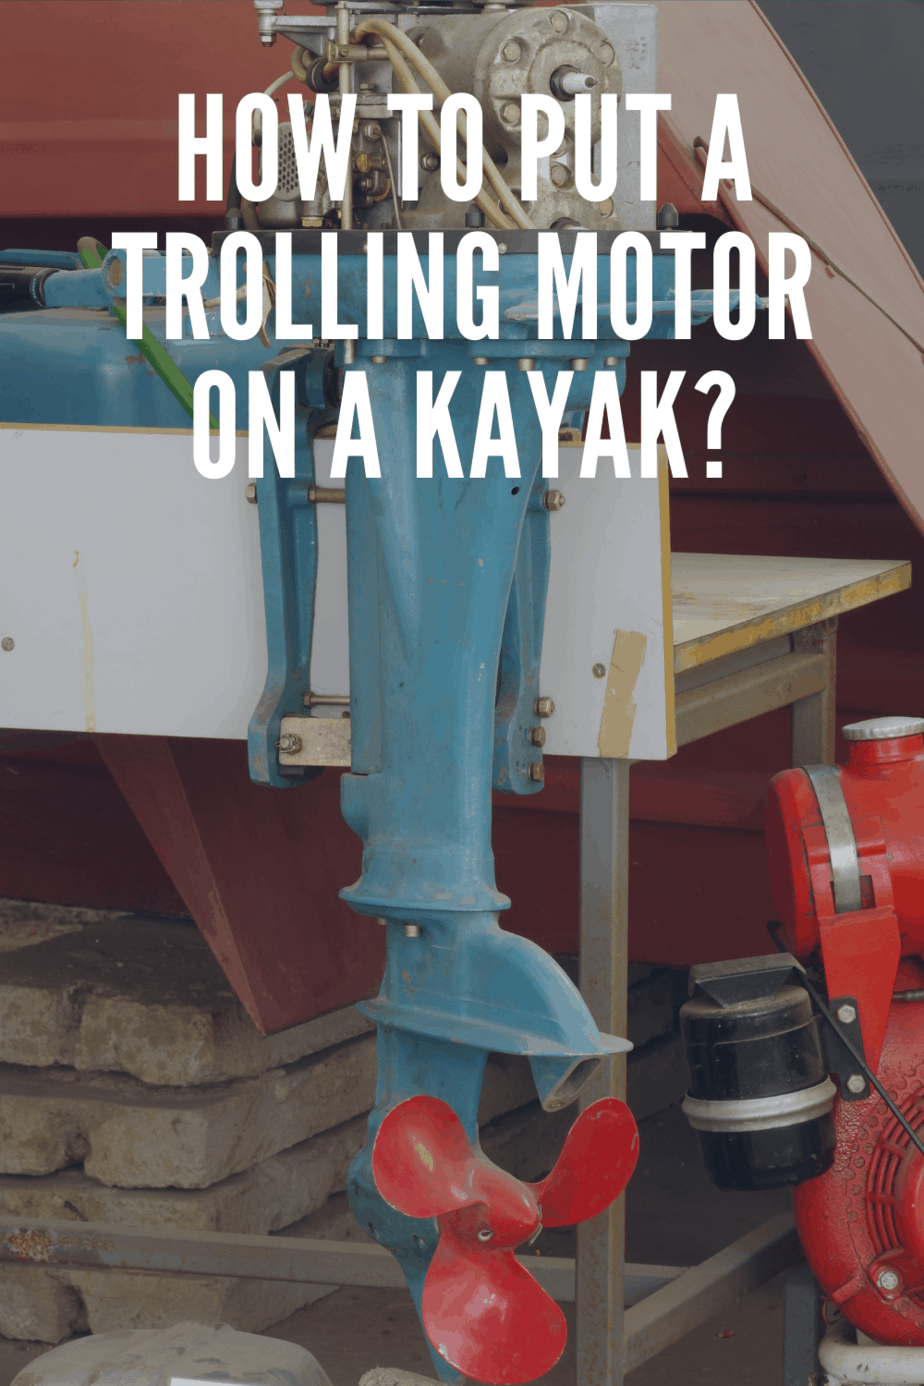
Installing a trolling motor on a kayak is a popular choice for kayak anglers. It’s also a useful approach for anyone that wants to cover more ground in a hurry without having to even lift your kayak paddle.
In fact, the best trolling motors for kayaking will render the best kayak paddles useless 10 out of 10 times on the water. And while it’s still a safe bet to keep a kayak paddle on your vessel in case of an emergency, a trolling motor will keep your hands free to fish, take pictures, or do anything else that you like to do from the comfort of your kayak.
Once you have a trolling motor and motor mount for your kayak, you’ll still need to answer the all-important question: how to put a trolling motor on a kayak?
Answering this question is exactly what we’ll do in this article. We’ll also provide critical information on how to choose the right trolling motor for your setup and give you a few options for trolling motors and motor mounts.
How To Put A Trolling Motor On A Kayak?
There is actually quite a bit of variety amongst trolling motors and how they’re designed to be installed on your kayak. Some trolling motors come with mounts and all of the hardware you’ll need for a complete installation.
If you purchase a trolling motor that comes ready-to-install out of the package, the best thing you can do is to closely follow the manufacturer’s instructions. But finding a trolling motor that comes with everything you need to install it is rare.
It’s more likely that you’ll need to purchase a motor mount, battery, and mounting hardware separately. Because of this, explaining how to put a trolling motor on a kayak requires that we cover the entirety of the process from start-to-finish.
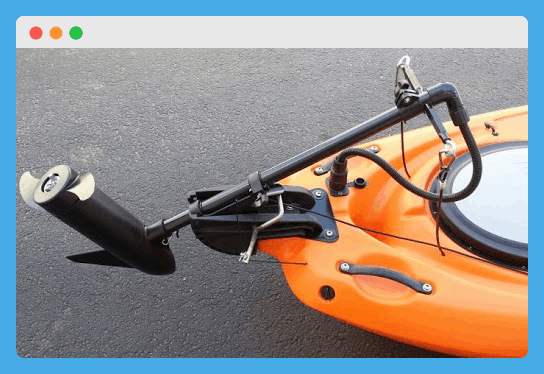
Choose Mounting Location
Before you even go about buying a trolling motor and all of the accessories that go with it, you’ll need to decide where exactly you want to mount your motor on your kayak. Kayak trolling motors are designed to be installed on the bow, stern, or gunwales of your kayak.
The advantage of mounting a motor on the gunwale of your kayak is that you’ll have easier access to it while still sitting comfortably in your kayak seat.
If you mount the motor on the bow or stern of one of the best fishing kayaks, for example, you’ll probably need a motor with remote control operation or the ability to connect to your kayak’s foot braces so that you can correct course while you’re on the water.
But having a motor mounted on the side of your kayak can create navigation issues in some cases.
Because the motor provides more thrust on one side of your kayak than the other, it might take a little practice to adjust your motor and make your kayak actually go straight or in the direction you prefer.
Choose A Compatible Motor Mount
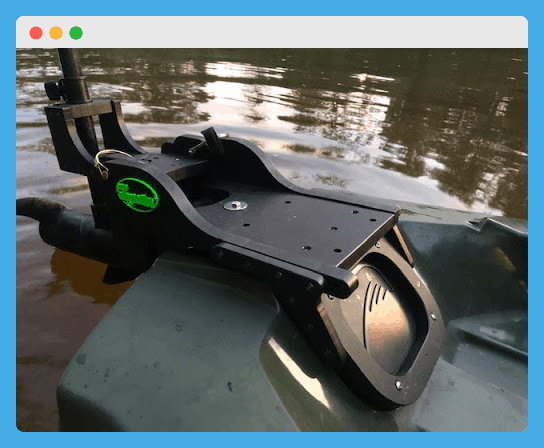
The reality of installing a trolling motor on a kayak is that you’ll need a compatible motor mount. The motor mount is the actual accessory that attaches to your kayak and then holds the trolling motor in place.
There are a variety of mounts available on the market. Some are designed to attach to the bow or stern of your kayak while others allow you to attach your trolling motor to the side of your kayak.
But the most important factor to consider when choosing a motor mount is its compatibility with your trolling motor and your kayak.
If you want to mount your motor on the side of your kayak, for example, you’ll need a mount that fits the specific width of your kayak.
If you choose a motor mount that is designed to attach to the bow or stern of your kayak, you’ll need to be sure that the mounting clamps or bolts are compatible with the bow or stern design of your specific kayak.
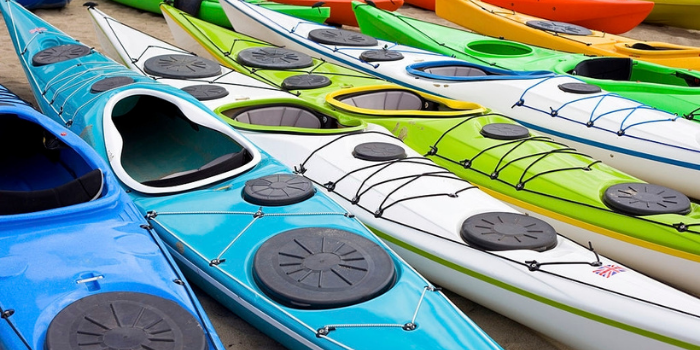
For sit inside kayaks, for example, there’s rarely a solid handle or edge of the kayak at the bow or stern. This means that you’ll definitely need a mount that allows you to attach your motor on the side of your kayak if you have one of the sit inside varieties.
But for certain sit on top kayaks, the design will allow you to either choose a bow/stern mount or a gunwale mount. So these kayaks can give you a little more flexibility to mount your motor on different places of your kayak.
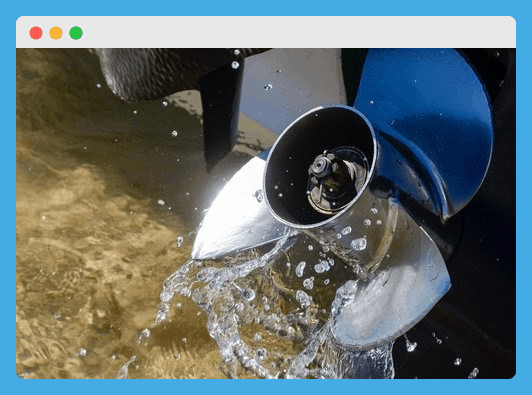
Attach The Propeller To The Motor
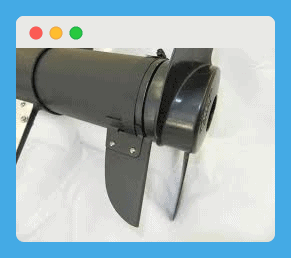
Most trolling motors unfortunately won’t come with the propeller attached. This is mainly for safety purposes and to protect the propeller from damage while it’s being shipped to your location.
If the trolling motor you choose comes with a compatible propeller, the process of attaching it should be relatively straightforward. The best way to make sure you attach it properly is to consult the instructions from the motor’s manufacturer.
However, not all motors come with a propeller and some require you to find a compatible aftermarket propeller to attach on your own.
To be honest, it’s always a good idea to have a backup propeller on deck just in case you run aground in shallower water and damage your existing propeller.
The right propeller might not necessarily allow your motor to propel your kayak at faster speeds, but it can increase the overall thrust of your motor.
Mount Motor To Kayak

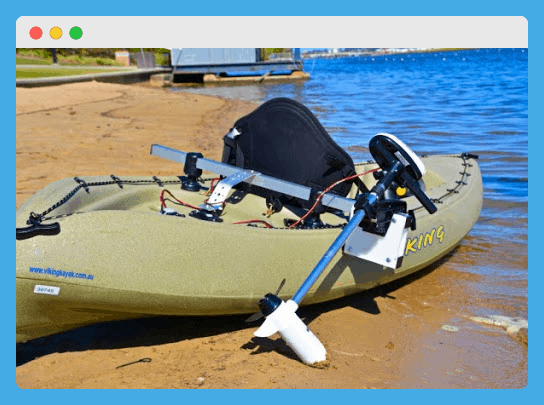
Now that you have your motor and compatible mount, it’s time to mount everything to your kayak. If your chosen mount comes with clamps, you’ll need to secure those clamps to the gunwales of your kayak to hold the mount in place.
If you go for a mount that attaches to the bow or stern of your kayak, you may still be able to use clamps to secure it to a molded-in handle. However, the higher likelihood is that you’ll need to drill holes to secure the mount to your kayak.
You’ll then use bolt-and-nut combinations to secure your mount to either the bow or stern of your kayak.
If you choose this type of application, you’ll need to make sure to add some sort of rubber gasket or liquid sealant to make sure the drill holes are watertight once the application is complete.
Once your mount is in place, it should be relatively simple to attach the motor using the appropriate bolts. Most mounts allow your trolling motor to swivel or pivot so that you can raise it in shallower water.
When you then put the motor down to begin using it, it should secure with some type of pin to keep it in place. Make sure that you always have this pin in place before you put your kayak on the water and begin to use the trolling motor.
In some cases, you might need to raise the motor while you’re still on the water, which will require removing the pin.
This can be a dangerous step if you’re kayaking in deep water, so you might consider attaching some sort of floating buoy or attachment to the pin so that you don’t lose it in case you drop it.
Build Steering Linkages
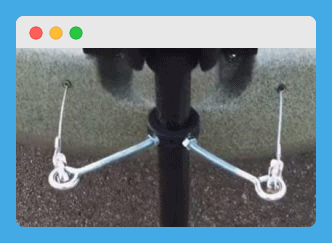
The next step is only applicable if you choose a bow or stern mounting location for your kayak trolling motor. For those that choose a gunwale mounting location, you’ll be able to use your hands to steer your motor and you won’t need to worry about attaching steering linkages.
However, if you desire hands-free operation for kayak fishing or other applications, mounting your motor on the bow or stern of your kayak is the best way to go. But this will require that you built the appropriate steering linkages.
These steering linkages will allow you to control the orientation of your kayak trolling motor with the foot pedals in your kayak.
This also means that this particular installation will only be appropriate for sit-inside kayaks that already have foot pedals equipped for use with a skeg or rudder.
If your existing kayak doesn’t already have a skeg at the stern, your process for installing steering linkages is going to be much more complex. This is why we’d recommend a gunwale mounting location for all kayaks that aren’t already equipped for rudder or skeg navigation.
That being said, kayaks that already have a skeg or rudder at the stern allow you to simply replace the existing skeg with a kayak trolling motor. To begin this process, you’ll need to identify the locations where the steering linkages enter your kayak at the stern.
Each end of these linkages should already contain some sort of fitting that attaches them to the rudder on the back of your kayak. These fittings are what you should detach from your existing skeg before you remove it from your kayak.
Then, once your motor is installed, you can connect two metal eye bolts to the shaft at the height of the steering linkages. The length of the eye bolts will depend on where exactly the linkages enter your kayak.
The linkages should have a little play in them once they are attached to the eye bolts. If they are too tight, it will restrict the movement of the motor shaft and reduce the effectiveness of your motor as a whole.
If the existing linkages aren’t long enough to retain some slack once they’re attached to the eye bolts running from the shaft of your motor, you should consider adding a small extension cable to each linkage so that they aren’t too tight.
Before moving on, make sure that your motor can rotate as you would expect it to. A great way to test the functionality of your trolling motor while you’re on land is to put your kayak up on a pair of portable kayak stands.
Wire Motor to Marine Battery
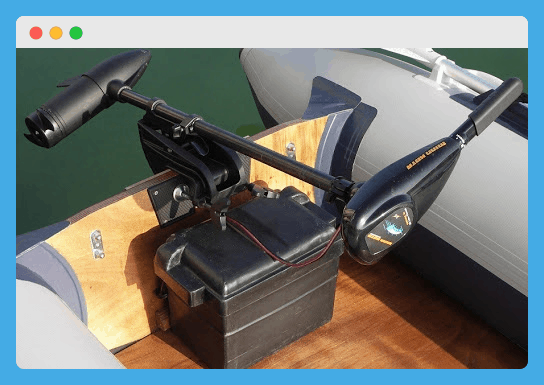
Now we’ve come to the stage of wiring your motor to your deep-cycle marine battery so that you can test it before you put it on the water. Fortunately, the wiring on these motors isn’t super complicated.
Start by removing the cap (or ”˜head’) on the top of the motor to expose the wiring and other electrical components. The coloring of the wires inside will vary depending on the exact type of motor you choose.
So this is another area where you’ll need to consult the manufacturer’s instructions to locate the two wires that you’ll attach to your marine battery. One of those wires will be a ground and the other will be a hot lead.
While black is a common color for grounds and red often signals a hot lead, we can’t overstate the fact that these colors can change depending on the manufacturer. So don’t skip any required reading when you’re messing with electricity!
If you’re confused by the wording in the instruction booklet that came with your motor, try searching for YouTube videos that detail the wiring process for your specific motor. This is a great way to get a visual aid to help with the wiring installation.
Once you have the appropriate wires connected and you’ve tested the functionality of the motor, you’ll need to make sure everything is watertight.
Fortunately, most trolling motor wires are wrapped in waterproof coating and any quality marine battery will come with a cover that protects the terminals from the potential negative impacts of water.
But marine batteries have different functions and applications depending on the type of watercraft you’re using. So if you need some help selecting a battery that’s compatible with your kayak motor, check out our review of the best trolling motor battery for kayaking.
Trolling Motor Buyer’s Guide
If you’re still curious about how to choose the right trolling motor for your kayak, here are the most important criteria you should prioritize when making your choice.
Thrust
Thrust is the common measurement that will signal the amount of power a trolling motor can supply. It is usually measured in pounds and, for a quick reference, every two pounds of thrust can move approximately 100 pounds of weight in your kayak.
This is important because most kayaks that are meant for trolling motors can be quite heavy and then you’ll add your own body weight and the weight of all of your kayak fishing accessories or anything else that you elect to bring on board.
Generally speaking, larger trolling motors will come with more thrust. But the good news for you is that most trolling motor manufacturers aren’t shy about advertising the amount of thrust that their motors can supply.
The minimum amount of weight your motor should be capable of moving is the combination of your kayak weight and your body weight.
For example, a motor on the back of a 70-pound kayak with a 150-pound person inside of it will have to be able to propel at least 220 pounds.
Coming back to our initial calculation of how much thrust it requires to move 100 pounds, this means you’ll need a minimum of 4.4 pounds of thrust to move that 220 pounds (220 x 0.02 = 4.4).
That being said, we recommend adding a minimum of 50 pounds (100 is better) to the combined weight of your kayak and your body.
This helps you account for a tackle box, kayak cooler, dry bags, and anything else you typically bring on board your kayak.
Don’t forget to account for the added weight of your new trolling motor itself! The weight of your motor (plus the motor mounting apparatus and your marine battery) will ultimately increase the total weight of your kayaking setup.
Power Needs

Most trolling motors are designed to be powered by a 12-volt, deep-cycle marine battery. And while these are the most common batteries used for this application, some motors have different power needs.
In addition to their voltage, batteries are also measured by their total energy storage capacity, and this capacity is typically measured in milliamp-hours (mAh).
For example, a battery that’s rated for 250 mAh will last approximately 125 hours when discharging an average current of 2 milliamps over that span of time.
So, you’ll need to know the required voltage for your trolling motor, but you’ll also need to know how many amps it will draw at full power. This will tell you how long your battery will last out on the water.
We simply want you to be aware that you’ll need to purchase an appropriate battery to supply power to your trolling motor.
In making this choice, you’ll need to strike a balance between a battery that’s large enough to supply your motor’s power needs and one that’s not too heavy as to add too much weight to your kayaking setup.
Size
The size of the trolling motor, motor mount, and marine battery you choose for your kayak will impact how much room you have for the rest of the items in your kayak fishing accessories kit.
If your ideal setup mounts in the stern of your kayak, for example, it could eat into the space in your stern storage compartment where you typically like to keep other kayak fishing accessories.
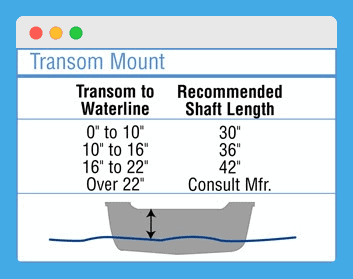
In addition, the size of the motor’s shaft will impact its performance.
A longer shaft will generally provide more thrust because it will extend deeper in the water but, on the same token, a longer shaft might not be the best for fishing in shallow waters.
Best Kayak Trolling Motors
Now that you know how to put a trolling motor on a kayak and you have some idea of how to choose a quality trolling motor for your kayak, here are a few of our top choices for the best kayak trolling motors!
1. Minn Kota Endura C2 30 Freshwater Trolling Motor
")
2. Newport Vessels Kayak Series Saltwater Trolling Motor
")
This motor has a shorter 24-inch fiberglass shaft that makes it ideal for fishing in shallow, brackish waters and it offers a six-inch telescoping handle that makes it ideal for gunwale mounting locations.
3. Watersnake Venom SXW Freshwater & Saltwater Trolling Motor

It offers a whopping 54 pounds of thrust, which also makes it an excellent choice for larger kayaks or larger individuals.
Final Thoughts

Learning how to put a trolling motor on a kayak isn’t overly complicated and it’s the best way to guarantee hands-free fishing or easier kayak touring for those that like to cover more distance.
Now that you know how to install a trolling motor on your kayak, you’ll be able to stay out longer and fish in more locations.
Or you’ll simply be able to explore more remote sections of your nearby lakes, rivers, or protected coastal waterways.
We hope you’ve found all of the suggestions and recommendations in this article useful. We wish you the best of luck selecting and installing a new trolling motor for your kayak!