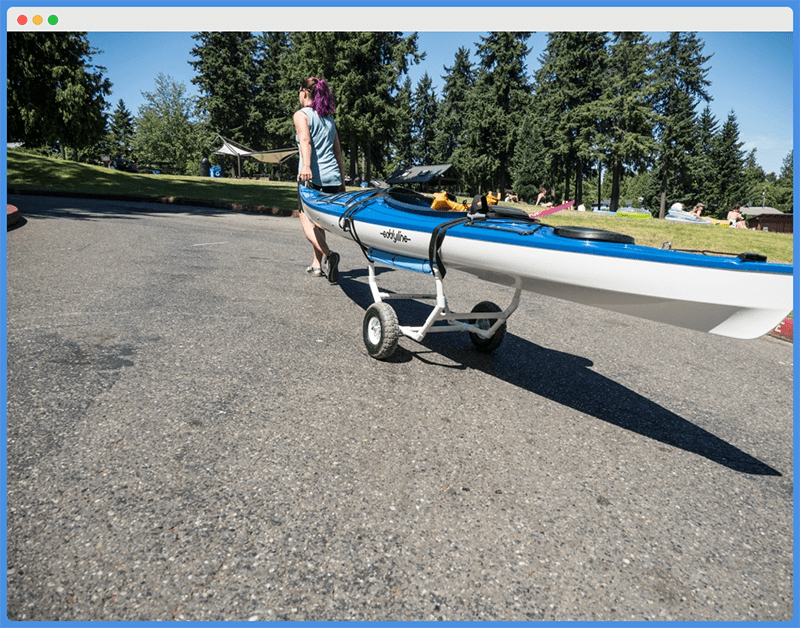
Not all of today’s kayaks are the lightest and easiest to move when you’re just trying to get them to the water.
This is especially true for many of the best ocean fishing kayaks and tandem kayaks on the market today.
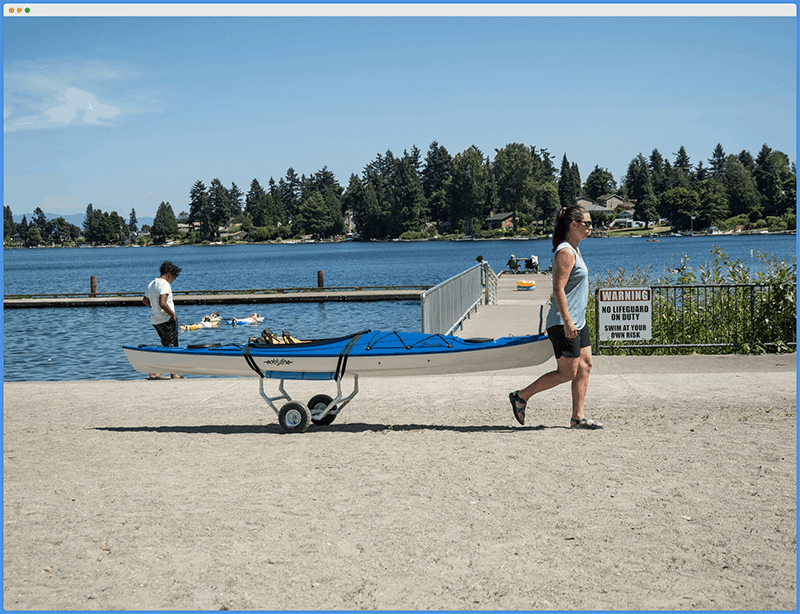
That’s why many people opt to buy one of the best kayak carts, wheels, and trolleys to make transporting their kayak much easier.
But if you don’t want to overspend on a manufactured cart, you can always explore building your own.
Fortunately, many folks have already had this thought before you and there are plenty of useful PVC kayak cart designs out there for you to choose from.
Plus, building a kayak cart can be the perfect DIY project for those rainy spring days that you’re stuck indoors dreaming of being out on the water.
In this guide, we’re going to introduce several PVC kayak cart plans and DIY concepts.
We’ll also review those plans and provide a thorough how-to guide to building your own PVC kayak cart.
So let’s get to it!
Why Build A DIY PVC Kayak Cart?
The best reason to build a PVC kayak cart is to save money! Even though it will require more time than simply buying a pre-manufactured cart online, the materials you’ll need to build one of these carts will cost a fraction of what you’ll pay for a pre-made model.
But another good reason to build one of these carts is simply to give yourself a fun DIY project that challenges both your body and your mind.
You might be surprised how rewarding it feels to go through the process of designing and constructing your very own PVC kayak cart.
The final reason for building one of these carts is that, in many cases, you’ll be able to build a cart that’s more durable than what you might buy online.
Unfortunately, even some of the best kayak carts won’t last very long if they’re used on a daily basis season after season.
PVC Kayak Cart Plans
To begin, let’s outline a few basic plans for building your own kayak cart using PVC pipe. Of course, you can feel free to blend two or more of these designs together, or simply use them as inspiration to come up with your own unique setup.
To be clear, this is not a complete list of all the kayak cart plans we’ve seen out there.
These are simply a few of our favorites and we’ve compiled them here to start giving you some ideas for how your own DIY kayak cart might look.
The ”˜Modified’ Hexagon
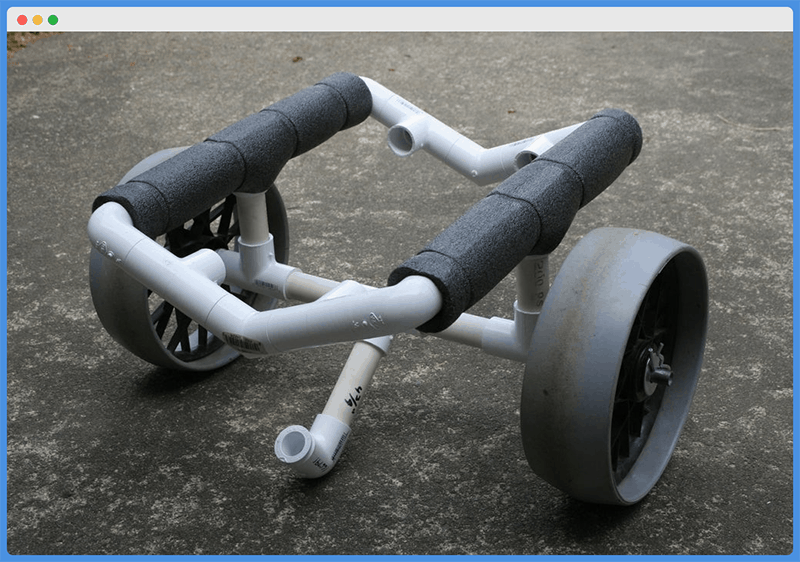
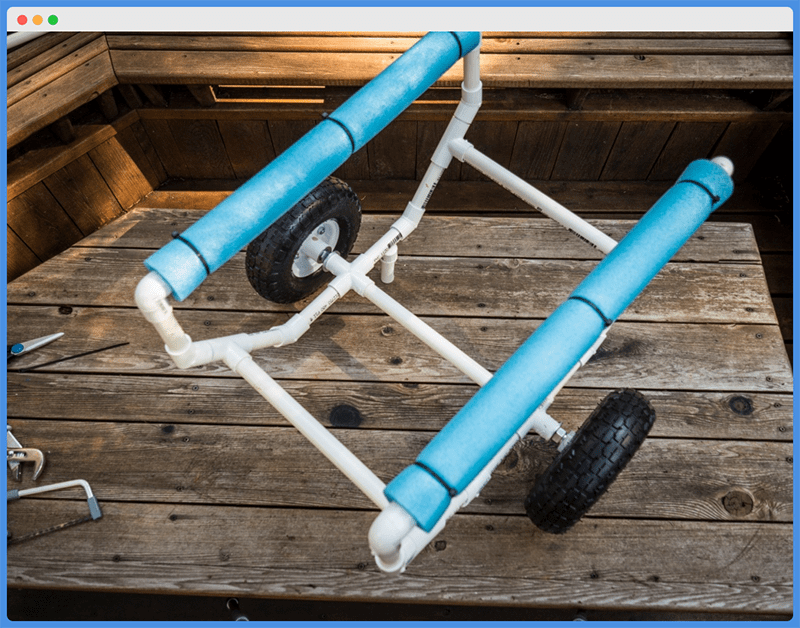
The basic plan for this PVC kayak cart includes two hexagonal-shaped sides and three crossbars connecting them.
The sides, of course, aren’t true hexagons because they have a longer top bar to provide plenty of support and stability for your kayak.
This plan also includes a lower threaded rod to which the inflatable wheels are attached to provide ease of movement for this cart.
It also requires that you attach your own kayak carrying straps to it to keep your kayak in place while in transit.
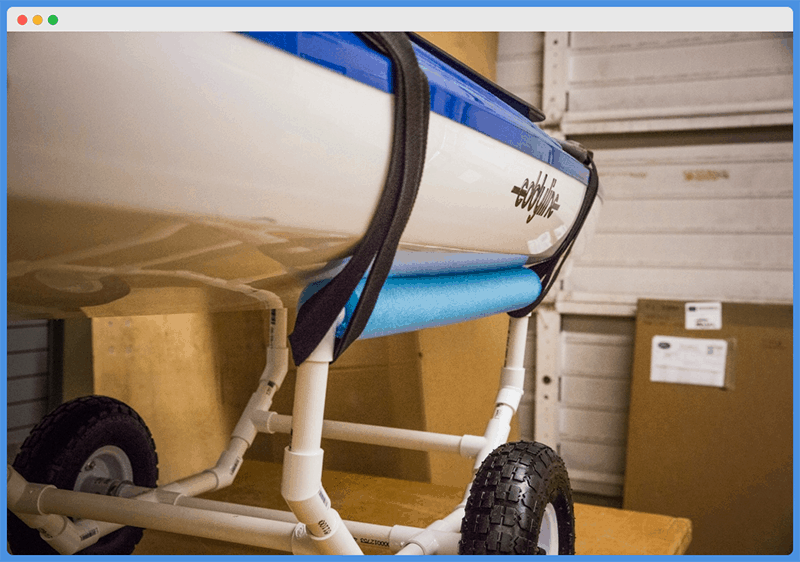
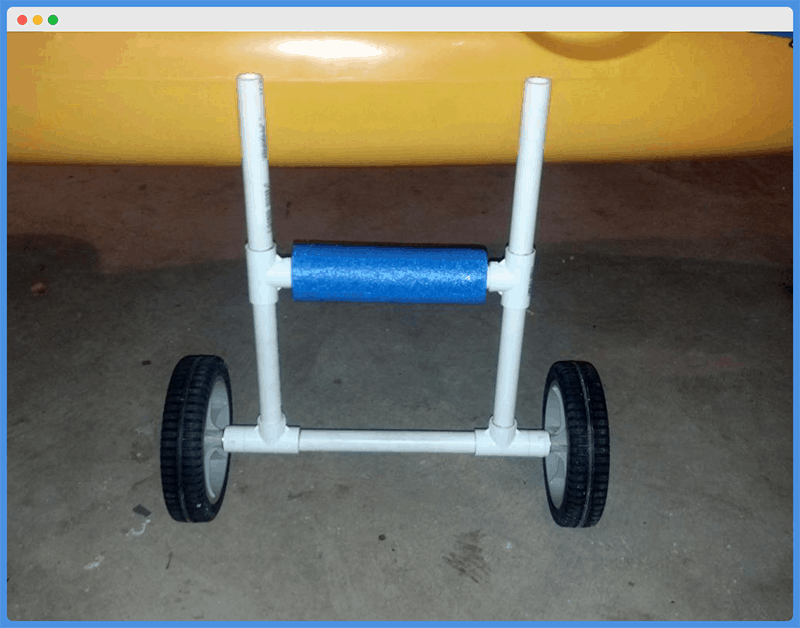
The ”˜T&H’
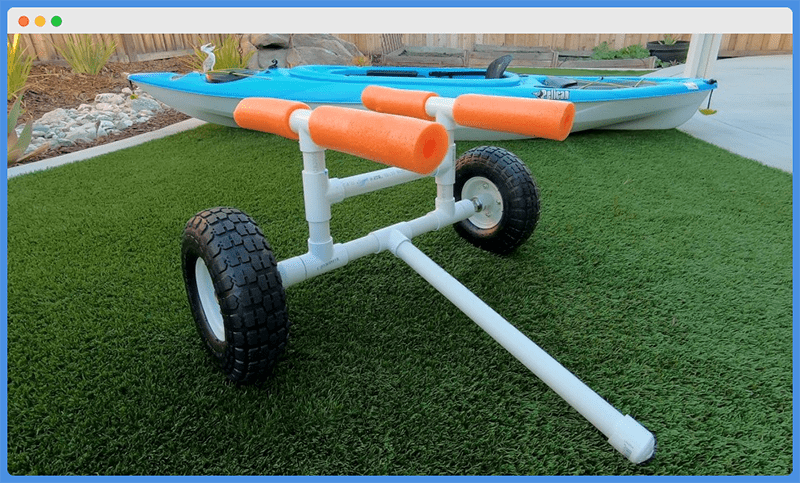
This kayak cart design gets its name because it features a T-shape when looking at it from the side and an H-shape when you sit it front-to-back.
This plan uses less length of PVC than the modified hexagon, but it will require thicker PVC if you want a cart that’s going to last.
This plan also includes two inflatable wheels with some sort of threaded rods to connect them. It also utilizes several T-shaped PVC joints, some sort of padding for the bottom of your kayak, and the appropriate hardware to keep the wheels in place.
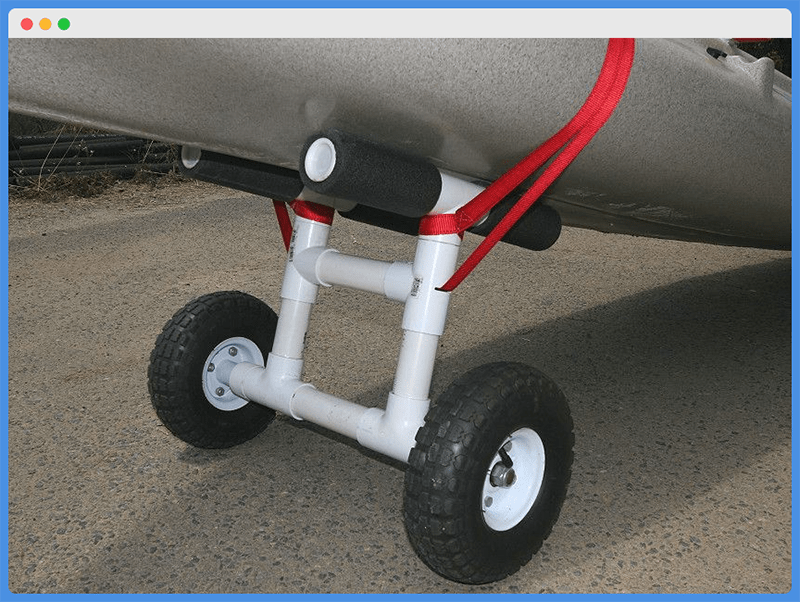
Through The Scuppers
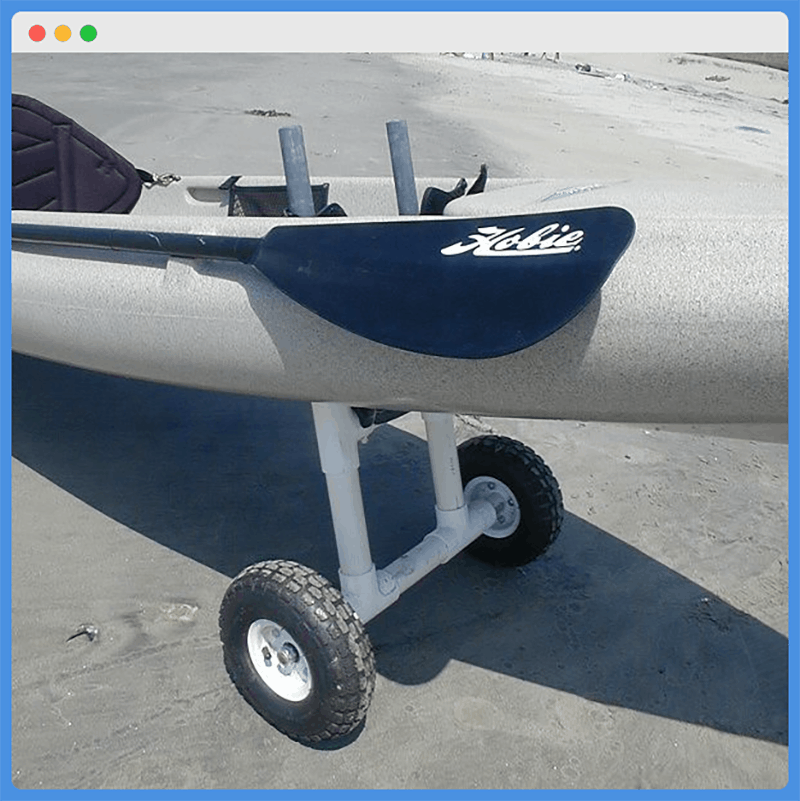
This is a simpler version of the ”˜T&H’ design because it features the same basic H-shaped initial structure without the need for the top T-shaped pieces.
Instead, the uprights will slide up into the scupper holes in the bottom of your kayak before you pull your kayak down to the water.
Many designers also add padding to the uprights and the higher crossbar on this design to provide additional protection for the structure of their kayak.
This design also requires two wheels, a threaded connector rod, and the appropriate hardware to keep the wheels in place.
The Cradle
The cradle design more closely mimics the V-shape of the bottom of most kayaks.
Instead of multiple side-to-side crossbars (like you’ll see on some of the other designs), it relies on front-to-back crossbars to provide extra support for your kayak.
This design usually features longer top bars and also utilizes 45°, 90°, and T-shaped PVC joints.
It also features a threaded rod to which you’ll attach the wheels and many of these designs include a small stand (pictured here running forward from the bottom crossbar) that makes it easier to load your kayak onto the cart before strapping it down.
PVC Kayak Cart Reviews
1. ”˜Modified’ Hexagon
The ”˜modified’ hexagon PVC kayak cart gets great reviews because it’s super easy to use and also very stable for your kayak.
The elongated hexagon shapes on the sides provide extra strength for longer and heavier kayaks.
This design is also great for sit-inside kayaks because it doesn’t need any sort of scupper hole to remain in place.
And, because it’s designed to be placed directly underneath the cockpit of your kayak, it helps to keep your vessel perfectly balanced while you’re rolling it.
That central placement also allows you to either push or pull your kayak once it’s strapped down.
And because the top bars are closer to the sides of your kayak, it also makes it easier to reach the straps rather than having to reach all the way underneath your kayak to locate them.
2. T&H
The ”˜T&H’ kayak cart design is the most minimal choice you can make.
So, if you’re interested in a plan that won’t require too many materials and will be relatively easy to assemble, this is a great choice for you.
Another benefit of this design is that it can be placed more towards the bow or stern of your kayak, depending on your preference.
It’s designed to work well with both sit-on-top and sit-inside kayaks.
But one of the downsides of the T&H design is that your anchor points for your tie-down straps will be well underneath your kayak once it’s loaded onto this cart.
Unless you design your T&H cart with a stand (like the one you see picture above), it can sometimes be difficult to get your cart to remain in place while you’re loading your kayak onto it.
3. Through The Scuppers
The through the scuppers kayak cart design is one of the few that’s specific to a certain type of kayak.
As you might have already guessed, you’ll only be able to use this type of PVC kayak cart with a sit-on-top kayak that doesn’t have scupper plugs in place.
But if you do have this type of kayak, this cart design has some advantages over the others.
For starters, it’s very effective at keeping your kayak from sliding back and forth on your cart when you hit bumps or cracks as you’re trying to get down to the water.
With some of the other carts, a failure to fully tighten your tie-down strap can result in the entire kayak sliding off the cart if you hit an obstacle.
This could cause damage to both your kayak and your cart if you’re not careful.
So, not only does the through-the-scuppers-style cart help to minimize the movement of your kayak, but it also eliminates the need for tie-down straps entirely (unless you’re transporting your kayak over pretty rough terrain).
One downside of this design is that there can be a lot of stress placed on the PVC uprights of your cart.
That’s why many builders of this type of cart tend to use thicker, more heavy-duty PVC, but you’ll still need to make sure it will fit through the scupper holes on your kayak.
Additionally, one suggestion for this type of kayak cart would be to pad the uprights that eventually slide through your kayak’s scupper holes.
This will prevent damage to a common area on many kayaks that is known to degrade and allow water to enter the otherwise-sealed portion of the kayak that you rely on for proper flotation on the water.
4. Cradle
The cradle-style design is a great choice for smaller kayaks and, in terms of build, it’s somewhere between the ”˜modified’ hexagon and ”˜T&H’ design in terms of complexity.
That’s because it relies on three different types of PVC joints, but not the four you’ll need for the ”˜modified’ hexagon.
This is another design that can make it tough to load your kayak onto unless you include a small kickstand in your design.
Some folks have remarked that a lot of the weight of your kayak ends up resting on the 45-degree joints in this design.
To be honest, that is a slight cause for concern because of the reduced strength that a 45-degree joint offers in comparison to a T-shaped or 90-degree joint.
That might also be the reason that this kayak cart is only best for smaller (and lighter!) kayaks.
Kayak Cart How-To Guide – The Hexagon
For its design integrity, ease of use, and durability, the hexagon-shaped PVC kayak cart is our choice for the best overall DIY kayak cart design.
So we’re going to focus exclusively on it in this How-To Guide.
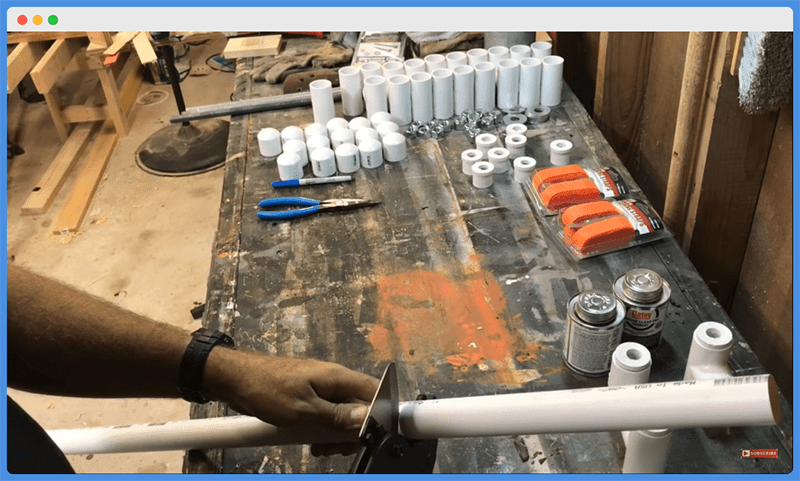
Gather Your Materials
To create this cart, here’s what you’ll need:
About 15 feet of ¾” PVC pipe (thicker-walled SCH40 is best)
- 4 90° PVC joints
- 8 45° PVC joints
- 4 PVC T-Shaped Joints
- 4 PVC Cross-Shaped Joints
- 2 Inflatable Hand Truck Wheels (preferably 6” in diameter)
- 2 â…” cut washers
- 2 â…” locking split washers
- 4 â…” nuts
- A 36” length of â…” diameter threaded rod
- All-purpose PVC cement
- One pool noodle
- 6 zip ties
- 2 tie-down cam straps (preferable NRS 9’ loop straps)
In terms of tools, you’ll also benefit from a hacksaw, a PVC cutter, and a cut-off wheel for this DIY project.
Make Your Measurements
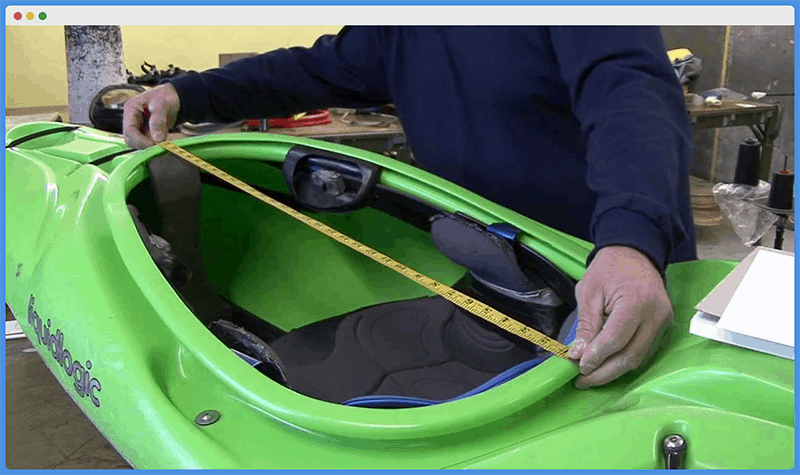
Now it’s time to measure your kayak to help you choose the appropriate size for the top of your cart.
Set your kayak up on a portable stand and measure the hull from just behind the cockpit to just in front of it.
In most cases, this measurement will be somewhere between 16 and 24 inches.
Our design is based on a 16-foot kayak with a 23-inch cockpit, but you might adjust the length of the top bars in your design to more appropriately fit your kayak.
While you have your tape measure handy, measure your PVC pieces and prep them for cutting in the next step.
From that original 15-foot section, you’ll want to cut three 14” pieces, two 23” pieces, eight 5” pieces, and four 2” pieces.
You may have a little bit of PVC pipe leftover if you nail your measurements on the first go.
But in case you forget the old adage, “measure twice, cut once,” you should have some extra to save yourself a secondary trip back to the hardware store.
Cut PVC Pieces
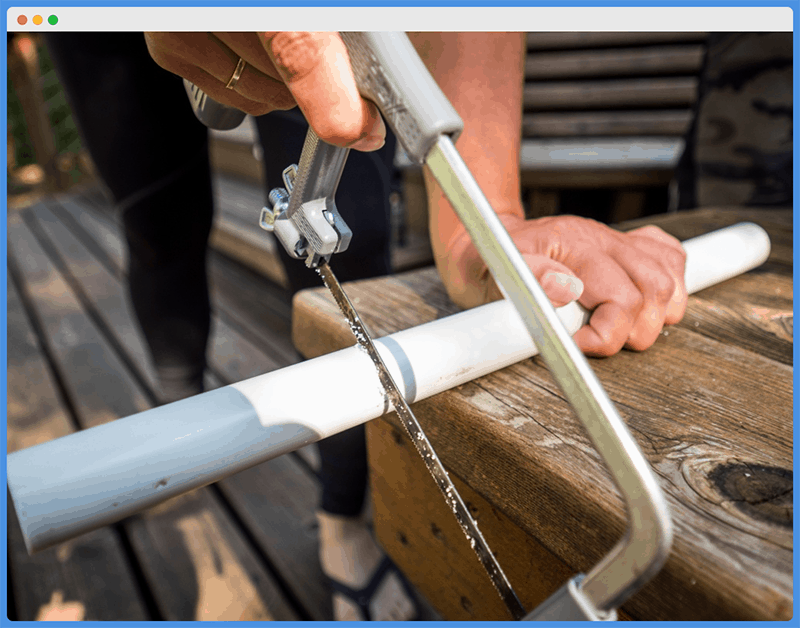
Now it’s time to get your hacksaw out, make sure it has a sharp blade on it, and cut your PVC pieces down to their appropriate lengths.
The best way to get clean cuts is to use the flat edge of a table as a guide.
But the good news about making a PVC kayak cart is that you’re going to be securing joints on the ends of all your pipe sections.
So this means you don’t necessarily need the cleanest cuts possible when you’re crafting your individual PVC sections.
Visualize It
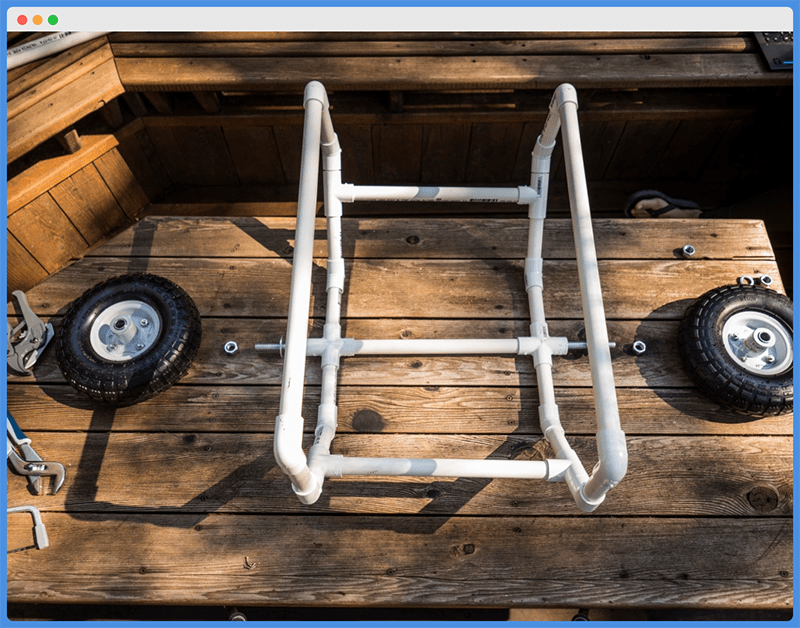
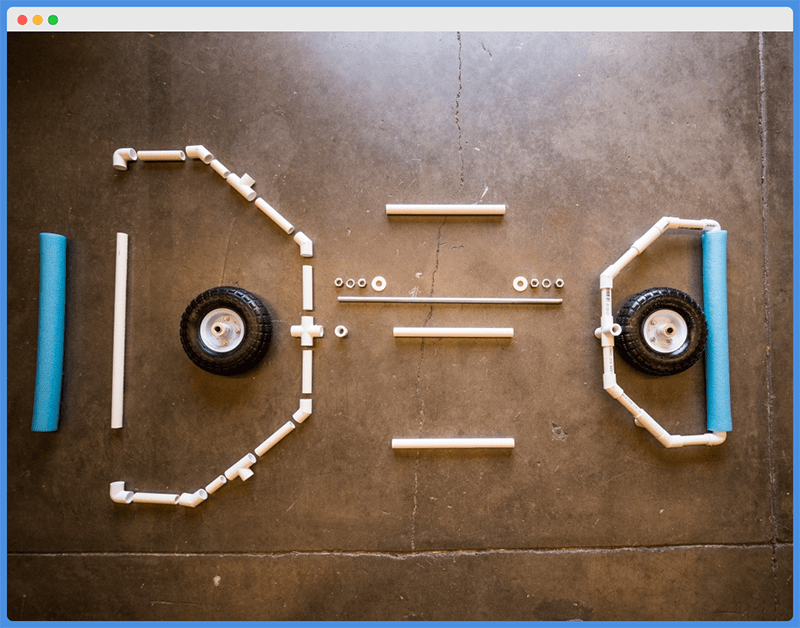
Next, it will help to lay out all of the pieces for your cart design so you can start to visualize how they’ll come together.
The image above can serve as your guide, but you’ll want to lay out the two sides (with the 23” top bars at opposite sides) with the connector pieces in the center.
The above image also serves as a useful guide because it illustrates how you can lay out all the pieces for the sides and how it will look once you put them all together.
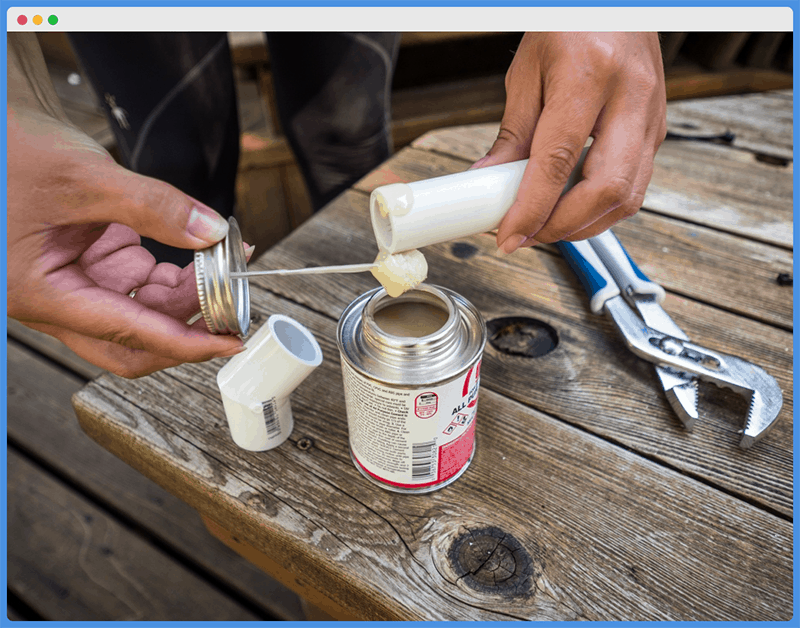
But before you go ahead and do that, you’ll need to grab your PVC cement.
Glue All Pieces
Using your PVC cement, you’ll want to start putting the two sides of your cart together.
Carefully apply a small amount of glue all the way around each piece of PVC pipe before sliding it into the corresponding joint.
In some cases, it may also be helpful to apply glue inside the joint as well.
But it’s always best to work one piece at a time so that you can avoid the PVC cement beginning to dry before you can connect pieces to joints.
The good thing about PVC cement is that it does dry relatively quickly, however.
So the first side that you glue together should be dry and solid by the time you finish gluing the second side together, and you should only have to wait 5-10 minutes for the second side to dry before you can progress to the next step.
Connect The Sides
When you’re confident that the two sides have dried completely, it’s time to put them together.
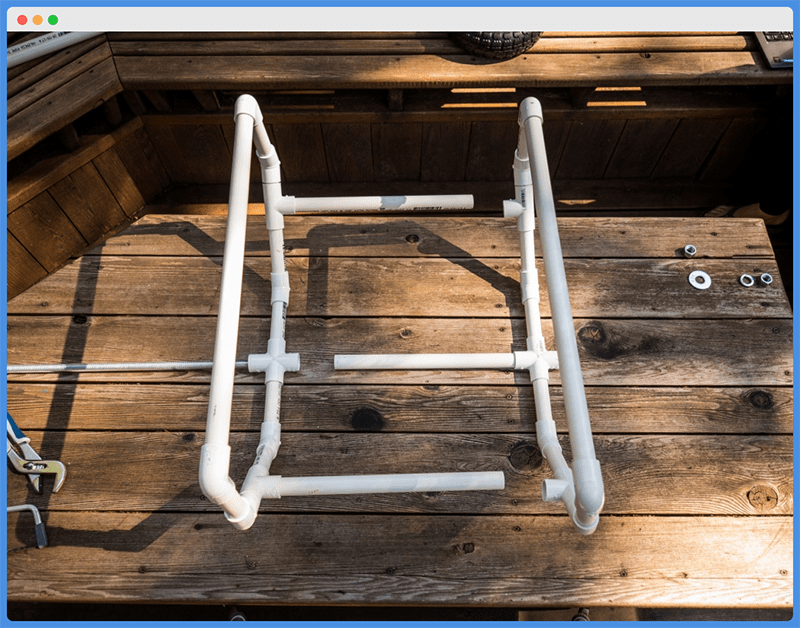
For the first step of this process, you’ll need to attach the three 14-inch PVC crossbars to their respective locations.
For this design, it seems that the best way to do this is to attach the lowest crossbar to the cross-shaped joint on one side of your design.
Then, attach the other two crossbars to the higher T-shaped joints on the opposite side.
Allow these first attachments to dry before you glue and connect the two sides of your kayak cart design.
Allow the entire structure to dry for 5-10 minutes before you move on to the next step.
Cut Threaded Rod and Assemble Axle
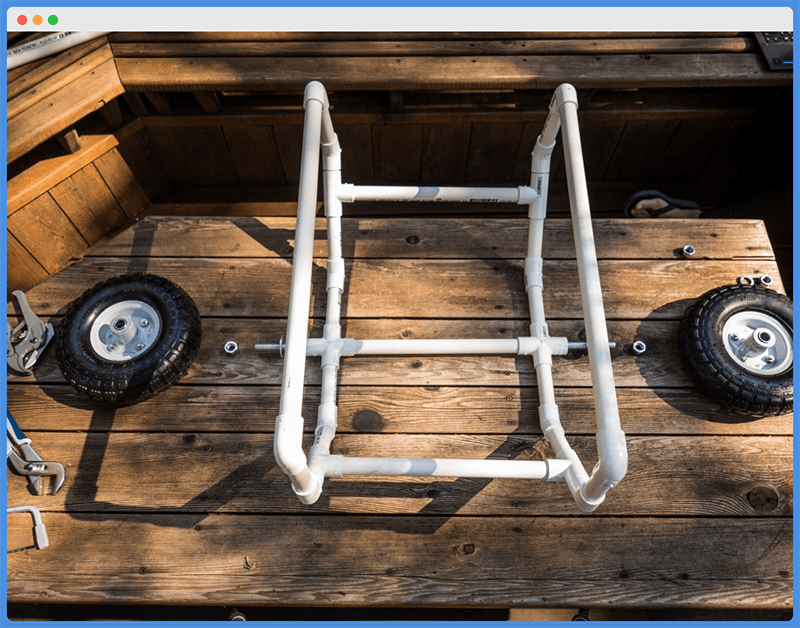
Now it’s time to put your axle together, but you’ll probably need to cut your threaded rod down slightly to eliminate wobble in your tires when you’re transporting your kayak.
To make the appropriate measurement for cutting the threaded rod, start by inserting it through the cross joint at the bottom of your cart.
Next, attach a cut washer, nut, wheel, lock washer, and second nut (in that order) to the threaded rod on one side of your cart.
Screw everything down tight enough so that you have at least two threads exposed at the end of the rod on that side.
Now you can attach the same hardware (in the same order) on the other side of the cart and make sure all of your hardware is snug against the outside of your cross joint on both sides of the cart.
You will have an extra bit of threaded rod on one side of the cart.
On that side, mark the precise location of your outside nut and then remove all of the hardware (and wheels) from both sides of the cart.
Then you can also remove the threaded rod from the crossbar and use your hacksaw or cut-off wheel to cut it down to the appropriate size.
After making this cut, it’s a good idea to use a metal file or fine-grit sandpaper to smooth any rough edges that are leftover.
Now, you can re-install your threaded rod and screw your hardware and wheels back in place.
Add Padding
The last step is simply to add sections of pool noodle to the top bars of your kayak cart to provide some gentle protection for the hull of your kayak.
You’ll need to cut your pool noodle into two sections that match the length of your cart’s top bars.
But some folks also choose to cut longer sections that will wrap over the corners of the kayak cart for an extra degree of protection.
The only difficulty with this choice is that it can be hard to hold your pool noodle sections in place as you secure them later on.
Whether you choose to go with pool noodles just along the top bars or over the corners as well, you’ll need to make a lengthwise cut on both of your sections so that you can slip the noodles over the PVC top bars.
From there, use your zip ties to hold the pool noodles in place. For a design of this size, three pool noodles should suffice, but more won’t hurt and will absolutely be necessary if you want to wrap pool noodles over the corners of your cart.
The final tip is just to make sure that the connector points for your zip ties wind up on the underside of your top bars so that they don’t scratch your kayak when you place it on your cart.
Now you’re done and ready to take your new PVC kayak cart out for a test run!
Final Thoughts
If your kayak weighs anything over about 40 pounds, you’re probably going to want a kayak cart for easier transportation.
As the distance you need to transport your kayak from parking lots to shorelines increases, so too does your need for a reliable kayak cart.
If you’re not one for easily trusting online purchases when you haven’t been able to see or try them out in person, a DIY kayak cart is perfect for you.
Just find the plan you like best and head down to your local hardware store to get all of your building supplies!
As a final tip, we do always recommend inflatable wheels over plastic or rubber wheels for your DIY kayak cart.
This is because they are better on uneven or rocky terrain and are more durable in the long-term (even if you have to add a small hand pump to your car to keep the tires inflated).
Keeping that in mind, we wish you the best of luck building your own PVC kayak cart and we wish you the best of luck on all of your upcoming kayak adventures!

