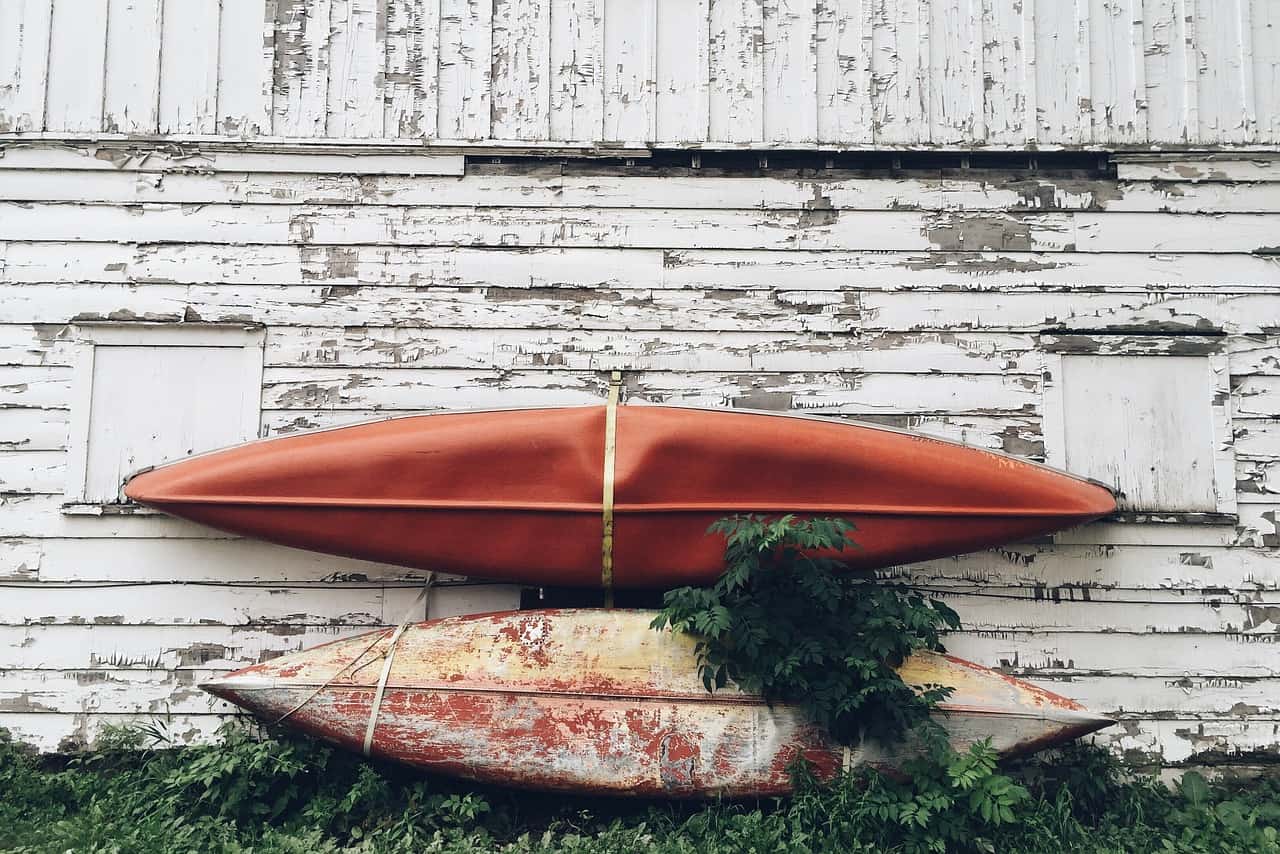
If you have an older canoe that has seen better days, it may be time to give it a facelift. The good news is that even some older canoes can still float and paddle just fine, but you may need to know how to paint a canoe to make it look a bit better.
There’s an old saying that says, “If you look good, you feel good,” and although your canoe may not have the same feelings as you and I, it still deserves a little tender loving care now and again.
Not all canoes, of course, can be painted but applying a fresh coat of paint to those that can greatly increase your likelihood to take it for a paddle. Plus, it will be more likely to be noticed by others once you’re on the water.
In this guide, we will provide some tips and tricks for applying a fresh coat of paint to an older canoe. Plus, we’ll give you some advice on applying the first coat of paint to a brand new canoe that you’ve just finished building.
Aside from that, you may find a few unexpected tidbits about the different types of canoes, which types are the easiest to repaint, and more!
How To Paint A Canoe?
Let’s start by addressing those of you that want to repaint an older canoe that has seen better days. To put it as simply as possible, you will need to remove any remnants of the original paint job, sand down the canoe, and then apply at least two even coats of paint.
Depending on the paint you decide to use, you may also need to apply a clear coat of stain after the paint has dried. For those of you that are painting a new canoe for the first time, the process is very similar, except you won’t need to remove the remnants of old paint.
If you have a metal canoe, of course, there is really no point in repainting it. The good news, however, is that this type of canoe didn’t require any paint to begin with, so it is less likely to show signs of paint wear than the other types of canoes.
That is as basic of an answer as we can give. However, as you might imagine, there can be more nuance to the art of making a new canoe paint job look really good.
So let’s spend the rest of this article diving into some of those nuances!
Can Your Canoe Even Be Painted?
Depending on the type of material your canoe is made of, it actually may or may not be able to hold a fresh coat of paint. So let’s begin by looking at the different types of canoe construction materials and discussing which can, in fact, be painted.
Wooden Canoes
Wooden canoes are mostly handcrafted and, as you might expect, they are one of the canoe types that can (and should!) be painted. Depending on the type of wood used to craft one of these canoes, many crafters will prefer the natural look and simply apply a clear coat of stain to the exterior.
Even these clear coats can be compromised over the years and require you to reapply. But if the clear coat is entirely gone, sanding and restaining or painting a wooden canoe is definitely possible and not super difficult to do.
Fiberglass Composite Canoes
Fiberglass composite is a collection of fiberglass material that has been molded and bonded together to create a strong hull. A true fiberglass composite canoe requires a painstaking construction process that must be done by hand.
Layers of woven fabric must be cut carefully and strategically placed to create a clean, strong fiberglass composite canoe. So beware of canoes that use only fiberglass material (and not fiberglass plus resin), as these canoes can be quite brittle.
Fortunately, fiberglass composite canoes are relatively easy to patch or repair. Marine paint also adheres to them very well if you want to give your fiberglass composite canoe a fresh new paint job.
Aluminum Canoes
Aluminum canoes used to be more popular than they are today, but there are still plenty of them out there. They are lighter than wooden canoes but still heavier than many of the modern materials used in canoe construction.
The great part about aluminum is that it doesn’t rust or degrade when it sits out in the sun. So this type of canoe doesn’t require paint and, also, can’t really be easily painted even if you wanted to.
Royalex® Canoes
Royalex® is a plastic laminate material that includes a core of expanded closed-cell foam. As a result, it is super rugged and makes a great material for canoes that are used for whitewater paddling.
This material is interesting because it naturally expands and contracts with changing temperatures. That means that regular seasonal maintenance is often required, and that is especially true if your Royalex® canoe has wooden trim.
The unfortunate part about working on a Royalex® canoe is that it’s not the easiest thing to do. While you can, indeed, find some resources to help you do so, we recommend taking your Royalex® canoe to a local canoe repair shop if it needs to be painted or refinished.
Polyethylene Canoes
Polyethylene is the same type of material used to make most of the best recreational kayaks on the market these days. So, as you might imagine, plastic canoes are usually made with a specific color of polyethylene and they are not necessarily made to be painted.
That said, the color of a polyethylene canoe is likely to fade over time, especially with prolonged UV exposure. So we’ve actually seen some creative and unique paint jobs on polyethylene canoes, but you won’t be able to strip the original color and down and completely repaint one of these canoes.
Kevlar Composite Canoes
Most of us probably think of something like a bulletproof vest when we hear kevlar, but this material is increasingly being used in canoe construction. One of the main reasons for this is that it is five to 10 times stronger than an equal weight of steel.
Kevlar composite is actually a woven fabric that is stronger and significantly lighter than other materials. In fact, a canoe constructed with kevlar can weigh up to 20% less than an equally-sized canoe made of fiberglass.
That said, kevlar composite is also easy to repair and work with, just like fiberglass. Most manufacturers make patch and repair kits and kevlar composite will hold a fresh coat of spray paint well if you want to change your canoe’s color.
How To Paint A Fiberglass Canoe
As we’ve established, fiberglass composite, Kevlar composite, and wooden canoes are the three main types that can be painted. So let’s provide some suggestions for painting fiberglass composite canoes first.
Note: this process should also be used for Kevlar composite canoes.
Check The Forecast

When cleaning your canoe, you will want to wait for the right weather window. Ideally, you’ll need three straight days of warm, dry weather to complete your canoe’s new paint job.
So you don’t want to start the process the day before it rains because you will need to allow your canoe to dry overnight a couple of different times during the process. Of course, you could also work on painting your canoe inside your garage or another covered storage space as well.
This will just need to be a well-ventilated area to minimize the hazards of paint fumes. Plus, it will behoove you to put down a large tarp or piece of painting canvas underneath your canoe so that you don’t leave permanent paint marks on the floor or walls of your working space.
Clean The Canoe
After you’ve found your weather window, the first step should be to clean the entire area of the canoe that you intend to paint. While painting the entire hull is usually going to be most people’s approach, you can also repaint only the bottom portion of the hull to save a little bit of weight.
Get a pair of sawhorses and evenly space them apart at a distance that is roughly equal to one-third of the total length of your canoe. Then, turn your canoe over so that the hull is facing up and set it down on your sawhorses.
It is best to clean your canoe outside because you will be using plenty of water. Ideally, get a power washer and use that to remove dirt, debris, and loose paint chips from your canoe’s hull.
Many local hardware stores will supply power washer rentals if you don’t have one readily available at your house. Just be aware that these washers are quite powerful and they require both eye protection and closed-toed shoes when operating them.
Let It Dry
The best way to dry your canoe is to allow it to air dry naturally overnight after you finish washing it. If you’re running a little tight on time, you can also use a towel or microfiber cloth to wipe the excess moisture off and then allow it to air dry after that.
Before proceeding, run your hands along the surface of the hull to ensure that it has dried completely. It must be 100% dry before you proceed with the next steps, so the best way to do this is to wash your canoe in the afternoon and then allow it to dry completely overnight.
Repair Deep Gouges
Before you apply a fresh coat of paint to any canoe, you should inspect the hull for deep gouges that have been the result of heavy impacts during use. If you don’t find any, you can skip this step.
If you do, you should use a Gelcoat repair kit to patch fill these gouges in before you move on to the next step. These kits come with specific instructions for how to mix the Gelcoat solution, and you should follow them carefully.
For canoes that only have minor scratches, we recommend skipping the Gelcoat repair step of the process. This is, in part, because any Gelcoat solution usually needs to cure for a minimum of eight hours before you can proceed with sanding the hull of your canoe.
Extra Tip: You may be able to substitute a fiberglass repair kit or epoxy repair kit for a Gelcoat solution, and some options out there may have shorter cure times.
Remove Stickers
Whether you’ve skipped the Gelcoat repair step or you are waiting for your Gelcoat to cure, you can finish prepping the hull for sanding by removing any stickers that your canoe has accumulated over the years.
Usually, the best way to do this is to use the edge of a utility knife to get under the edge of the sticker and pry it up until you can get a solid hold on it with your fingers. In many cases, slow and steady is the best way to remove stickers cleanly from any surface.
The good news is that you will be sanding the entire surface of the hull next, so any small remnants from stickers should be removed during the sanding phase. You can also use acetone to rub any sticker residue off before proceeding to the next step.
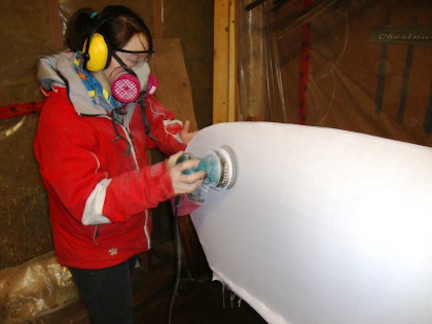
Sand The Hull
PC Canoeguy’s Blog
It’s almost time to start sanding down the hull, but before you grab your sander, make sure you put on some gloves, a dust mask, and eye protection for this step. Fiberglass splinters in your nose, eyes, and hands are no fun.
They also really don’t feel too well if you get them embedded anywhere in your skin. So you may also consider wearing a long-sleeved shirt and pants for this part of your process.
Ideally, you should use round 120-grit sandpaper and an electric orbital sander to make quick work of sanding the hull of your canoe. Square 120-grit sandpaper can be used if you want to do things by hand, but it will take much longer.
During this process, you don’t necessarily need to remove every remnant of old paint. Your goal is to simply rough up the entire hull of your canoe so that your new coat of paint will adhere more easily.
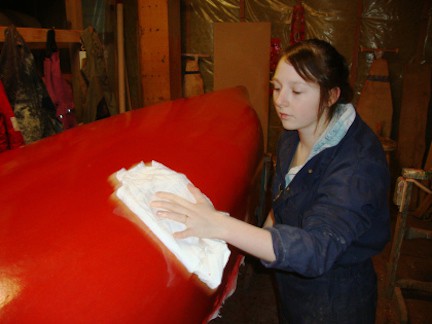
Wipe It Down
PC Canoeguy’s Blog
Now you need to remove all of the dust you’ve created during the sanding phase from the surface of the hull. While you can always use a leaf blower or something like that to remove the first coat, you should finish by wiping the hull down with some kind of tack cloth to remove all dust.
Tape It Off
Next, use masking tape to tape off any non-fiberglass areas that you don’t want to paint. This means covering any metal or wooden pieces along the gunwales or at the bow or stern of your canoe.
Taping off the gunwales (sides) and bow and stern of your canoe is much easier than not doing so, even if it takes a little extra time. Otherwise, you will have to be really careful not to get paint on these areas while you are applying it.
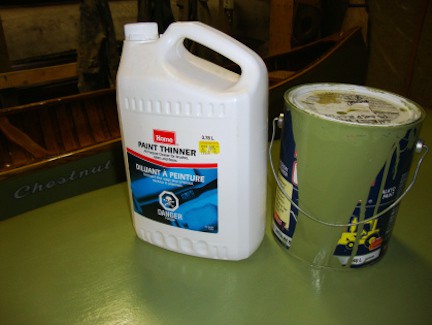
Mix Your Paint Solution
PC Canoeguy’s Blog
For fiberglass composite and Kevlar composite canoes, most folks recommend oil-based marine paint because it is easy to clean and can handle prolonged exposure to marine environments.
That said, it is also recommended to mix a 9-to-1 solution of marine paint and paint thinner.
To be clear, this means nine parts marine paint to one part paint thinner. It is alright to use less paint thinner, just make sure it doesn’t comprise more than 10% of your paint solution.
This will help the marine paint coat the fiberglass more evenly and adhere to it more strongly. Use a paint stick to mix your solution right in the bucket or mix nine to one in a paint tray to prepare for application.
Apply The First Coat
We recommend using a four-inch paint roller to apply the first coat of paint to your canoe’s hull. Work in sections that are roughly two to three feet in diameter to ensure that you are coating the surface evenly.
Start by applying an even coat of paint to all of the easy-to-reach parts of your canoe’s hull. Then, go back and apply paint along the gunwales and at the harder-to-reach spot at the bow and stern of your canoe.
Although we recommend using a paint roller for this first coat, you should also keep a paintbrush nearby. You will most likely use the brush for working along the gunwales and it can also help you smooth out any bubbles left after the initial application with the paint roller.
Let It Dry (Again)
After applying an even first coat of paint, you will need to let your canoe dry for approximately 24 hours before you can proceed. Although it will feel dry to the touch after a couple of hours, it will need a full day before you can apply another coat.
It’s also possible to move your canoe during this phase if needed. It should be dry enough to handle within about six hours after applying the first coat of paint, but it’s good to use clean, dry rags if you need to move it so that you don’t get it dirty before you can apply a second coat.
Sand and Wipe (Again)
Once 24 hours have elapsed, use a fresh piece of round 120-grit sandpaper to lightly sand the entire hull of your canoe again. Again, wear your eye protection, dust mask, and gloves during this process.
Remember that your goal, again, is not to remove that fresh new coat of paint you just applied. You just want to rough up the surface so that your second coat will adhere more strongly.
Then, use another clean tack cloth to wipe away the dust left from the sanding process.
Apply Second Coat of Paint
Using the same method as you used for the first coat of paint, you can now apply a second even coat over the entire surface of the hull. Be sure to go back and hit all the areas along the gunwales, bow, and stern after you apply paint to the easier-to-reach parts of the hull.
You can always repeat the last few steps and apply a third coat of paint if you aren’t quite happy with the look you’ve gotten from two coats.
Wait 48 Hours
After you are finished with your canoe’s new paint job, we recommend waiting at least 48 hours before you start using it again. Again, it will be okay to move the canoe after about six hours, but waiting a full two days will be erring on the safe side to make sure the paint has fully cured before you put it in the water.
Note: It is also a good idea to read the manufacturer’s instructions on the paint you choose to understand the recommended cure time for that specific paint.
How To Paint A Wooden Canoe
Wooden canoes also require oil-based marine paint and will require roughly the same process as we outlined above for painting a fiberglass canoe. However, there are a few critical differences worth mentioning here.
For starters, some skilled wooden canoe refurbishers recommend that your mix of paint and paint thinner include up to 12% thinner. This helps the paint self-level helps it dry more quickly before it sags or drips, but it’s slightly higher than the 10% threshold recommended for fiberglass canoes.
Also, many wooden canoes have a beautiful natural look as a result of the wood used in their construction. So you should be careful to consider using an oil-based clear coat instead of colored paint if you want to preserve the natural look of your wooden canoe.
Tip: Products like Marine Wood Finish and Pure Tung Oil are often used by those handcrafting wooden canoes and wooden canoe paddles.
Final Thoughts
Refurbishing your old canoe might just be the perfect spring hobby while you wait for the weather to warm up. Or it might be your final step in a months-long process of handcrafting your own canoe from scratch.
Either way, we hope you’ve found our many suggestions for how to paint a canoe useful in this article. As always, we wish you the best of luck on all of your upcoming paddling adventures and we wish you a full season of joy and fun on the water!