Every good kayak should have a place where you can store gear or snacks that you don’t want to be exposed to the elements. This is where a kayak hatch comes into play and they come in many shapes and sizes.
In our ultimate guide to kayak hatches, we are going to cover the varying types of hatches, their pros and cons, the difference between hatches and bulkheads, and some important information about how to choose and install a new kayak hatch if you have to.
If you are getting ready to buy a new kayak or sell your old one and upgrade, knowing more about hatch considerations will help you make sure that the kayak you choose will have enough storage space for your accessories and essential kayaking safety equipment.

Photo by Travis J. Camp via Shutterstock
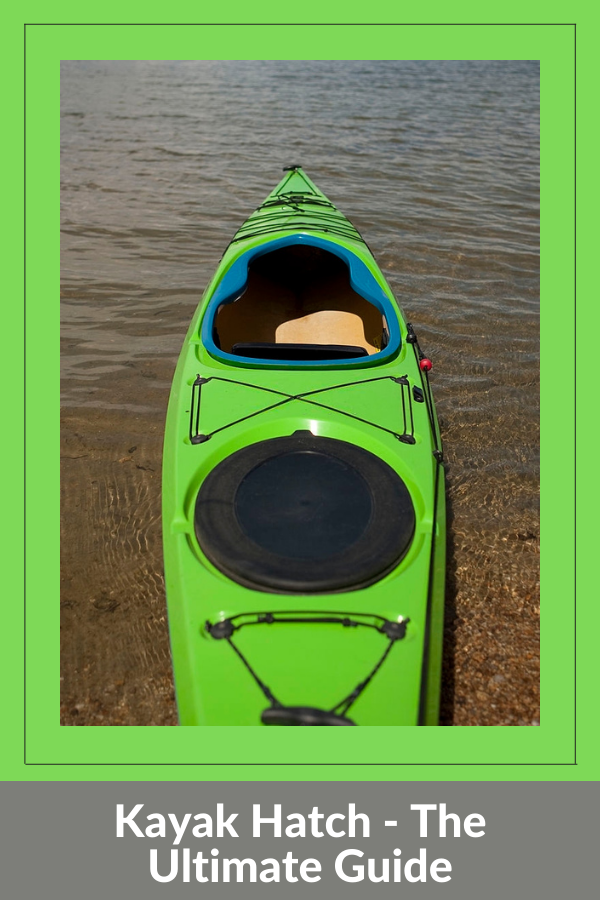
What is a Kayak Hatch?
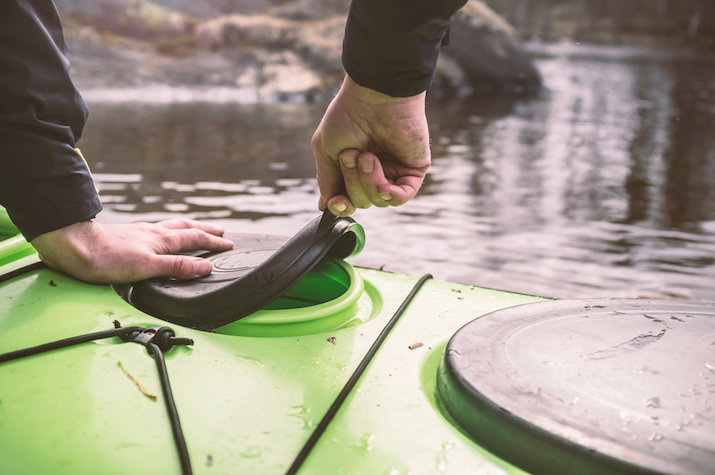
Photo by Koldunov Alexey via Shutterstock
A kayak hatch is an enclosed area within the hull for storing various types of kayaking gear. Their openings can be different shapes and be built into different sections of a kayak depending on the model.
To put it even more simply, a kayak hatch is a hole in the top of the deck of your kayak. Once sealed properly, it allows you to keep sensitive gear from being exposed to potentially damaging elements while you are kayaking.
A kayak hatch is sealed by one of the best kayak hatch covers in order to keep the watertight (in an ideal world).
However, not all kayak hatches are as waterproof as you might prefer, which is why you will also need to know how to choose the right size dry bag for your kayak.
In combination, a kayak hatch and a dry bag will allow you to keep things like extra clothing layers, cooking utensils, and camping gear dry if you attempt long-distance, multi-day kayak expeditions once you gain experience.
What is the Difference Between a Kayak Hatch and a Bulkhead?
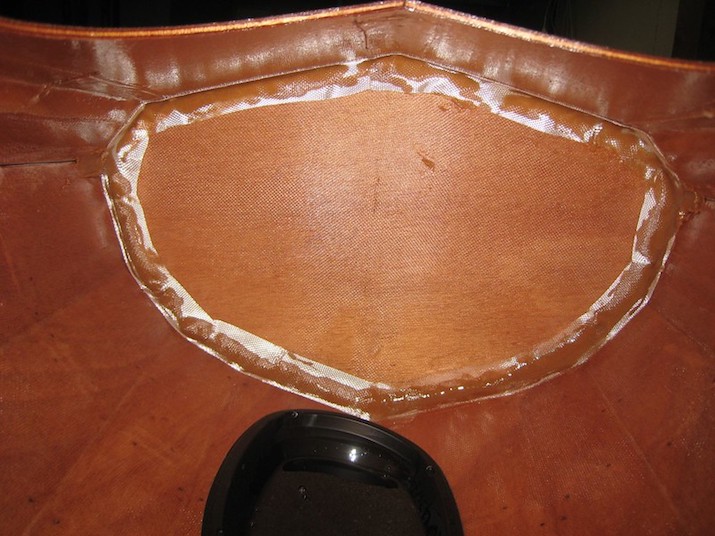
Photo by Morkin_99 via Flickr
There can often be some confusion between a bulkhead and a kayak hatch. So let us provide a couple of quick definitions in an effort to clear things up.
A kayak hatch is a storage compartment inside the hull of a kayak that is used to stow a variety of kayaking accessories. You will find them on both sit-on-top and sit-inside kayaks.
A bulkhead is a wall built inside the hull of a sit-inside kayak (only). They are usually made of some type of foam and their purpose is to help the kayak retain buoyancy if the cockpit fills with water.
You may hear some people refer to the storage areas in a sit-inside kayak as “bulkhead compartments” as well. For all intents and purposes, this term is synonymous with a kayak hatch.
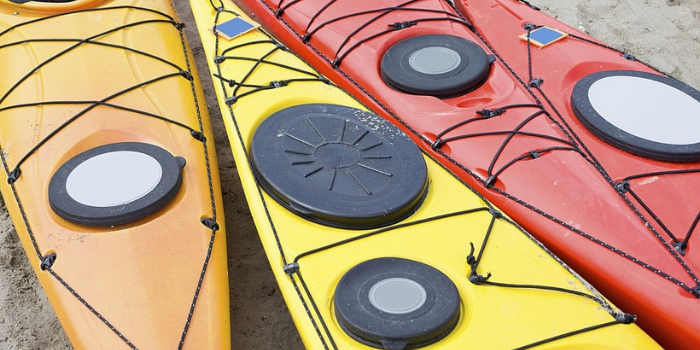
The Different Types of Kayak Hatches
There are three main types of kayak hatches you will find on all kayak models. They are delineated based largely on their shape but keep in mind that there can be variation in size as well.
The three main kayak hatch types are round, square (or rectangular), and oval hatches. Let’s dive a little further into each and discuss some of their pros and cons.
Round Hatches
Photo by Dykyi Mykyta via Shutterstock
You will typically find a round kayak hatch towards the bow or in the center of a kayak. Occasionally, designers will place a round hatch at the stern, but that is a more common area for other types.
Round hatches are typically equipped with rubberized, slip-on hatch covers that seal around the edges. They are super easy to remove and put back in place and are also one of the easiest and most affordable hatch cover styles to replace.
There are two types of round hatches and the first type is what you will more commonly find in the cockpit of a sit-on-top kayak.
The diameter of the hatch cover will typically match the diameter of the hatch itself and they may or may not come with a mesh bag inside to keep your gear organized in one place.
The other style is typically found towards the bow of your kayak. In this style of round hatch, the interior storage space is usually much larger than the diameter of the hatch opening, which is why you will often find this style on sit-inside touring kayaks that are built to haul larger loads.
Square/Rectangular Hatches
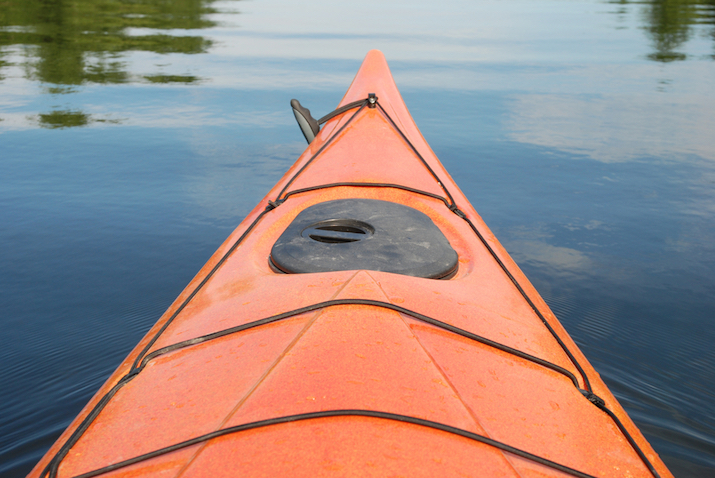
Photo by Brittany Courville via Shutterstock
Square hatches get this label because they have the most defined edges of the three major kayak hatch types. However, as you can see in the photo above, many of these hatches are typically closer to rectangular if you are going to nit-pick.
Some will have one end that is narrower than the other, but most square and rectangular hatches will boast a hard plastic or rigid rubber hatch cover that secures into place with some sort of locking mechanism.
On some designs, this looks like a circular handle that turns one way to lock and the other to unlock. On other designs, you will find two lever-like mechanisms that must be flipped into place to lock the hatch cover and seal the hatch from water and debris.
You will sometimes find this hatch style at the front of a crossover kayak, but they are more common in the center or just behind the seat in some of the best pedal fishing kayaks.
With the latter kayak style, the rectangular hatch is designed to house the battery for an electric trolling motor.
Oval Hatches
Photo by Isabela66 via Shutterstock
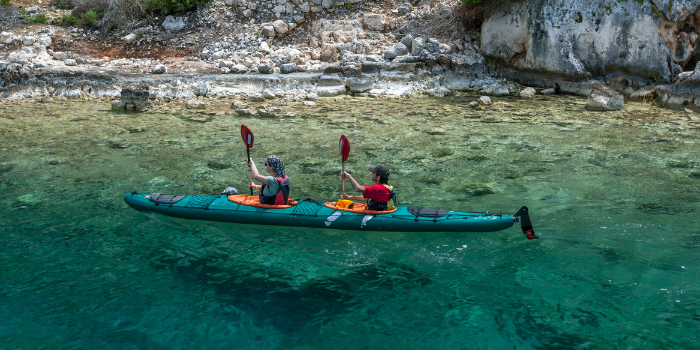
Oval hatches are commonplace among the best sea kayaks for long-distance expeditions. Some of these kayaks will have oval hatches at the bow and stern while others will only have them towards the stern (and have a round hatch at the bow).
In almost all cases, the diameter of the opening for an oval kayak hatch will be smaller than the actual area of the internal storage space inside the kayak. Still, oval hatches make it easier to fit larger dry bags, camping equipment, or fishing supplies inside the storage space.
Oval hatches are typically sealed with one of two types of hatch covers. The first type is the same style of rubberized, slip-on cover that you will find on round hatches and the second more closely resembles the hard plastic hatch covers with locking mechanisms found on square and rectangular hatches.
Can You Replace a Kayak Hatch?
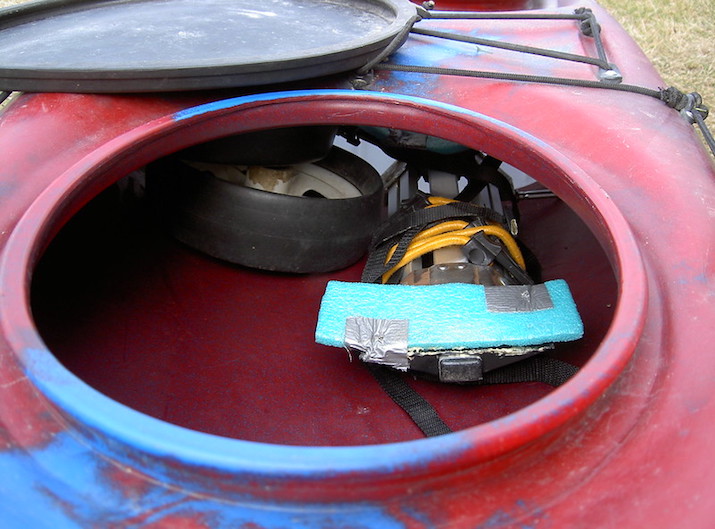
Photo by Steve Seeger via Flickr
To be completely honest, a kayak hatch cannot actually be replaced without seriously altering the actual design of your kayak.
Because the opening was formed during the kayak’s rotomolding days, the only thing about it that inexperienced kayak manufacturers can really replace is the hatch cover.
Like we said above, most kayak hatches are simply holes in the deck of your kayak. Without making major alterations to the hull of your kayak (which we don’t recommend), there is no easy DIY process for replacing or changing your kayak hatch.
It is much easier to install a new kayak hatch where one previously didn’t exist than to replace or alter an existing hatch.
If you are deadset on altering the hatches in your kayak, we would recommend seeking professional assistance to help you do so without compromising the integrity of your kayak.
How To Install A New Kayak Hatch
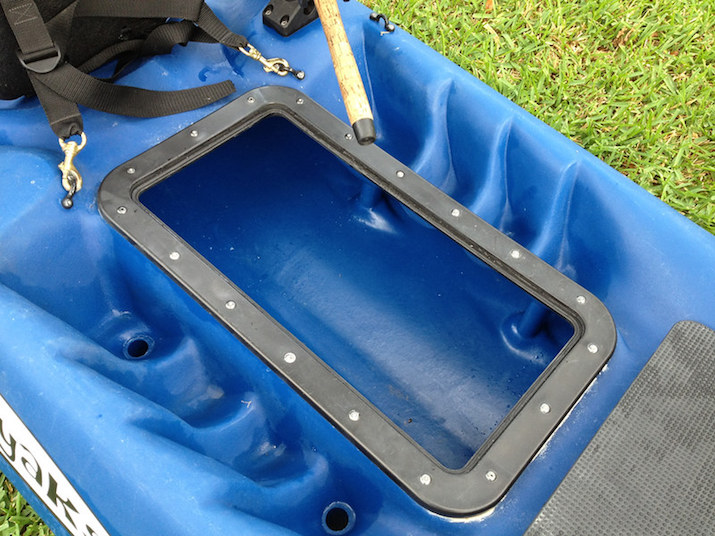
Photo by Infinitenachos via Flickr
It is possible to install a kayak hatch on the deck of your kayak if you did not have one there before. The best-case scenario for this is to begin with a flat part of your kayak’s deck that did not previously have any accessories or features mounted to it.
The Risk of Installing a New Kayak Hatch
Before we dive further into a brief overview of the techniques required to install a new kayak hatch, we need to mention one big risk of going down this road. That is the possible risk of compromising your kayak’s bulkhead.
If you fail to install a new kayak hatch properly, the sealed bulkhead set in place by the manufacturer may no longer do its job.
This can result in reduced buoyancy once you put your kayak back in the water and, in the worst case, can cause you and your kayak to sink.
Step 1: Choose The Type of Hatch You Want to Install
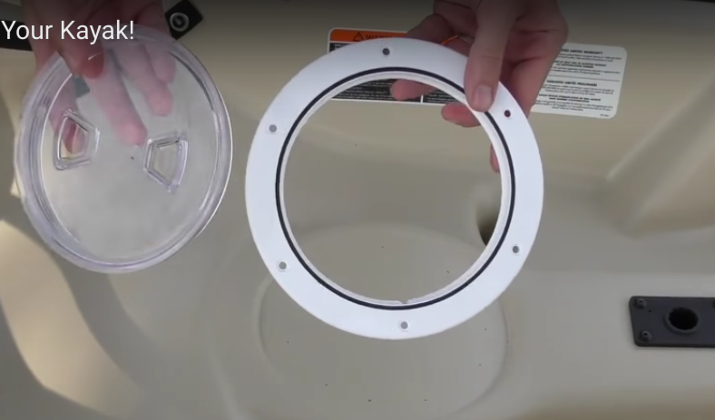
PC KayakDIY via YouTube
Your first step is to choose whether you want to install a round, square, rectangular, or oval-shaped hatch in your kayak. This decision should largely be dictated by the amount of space you have where you plan to install it.
It may also, however, be influenced by your experience with how easy (or difficult) it is to retrieve gear from certain types of hatches.
Generally speaking, a hatch with a wider opening makes it easy to load and unload all types of kayaking gear.
Additionally, consider what you will typically store in your hatch. You may, for example, need a rectangular hatch if your end goal is to add a trolling motor to your fishing kayak and you need a place to rest your deep cycle marine battery safely.
Step 2: Measure The Area
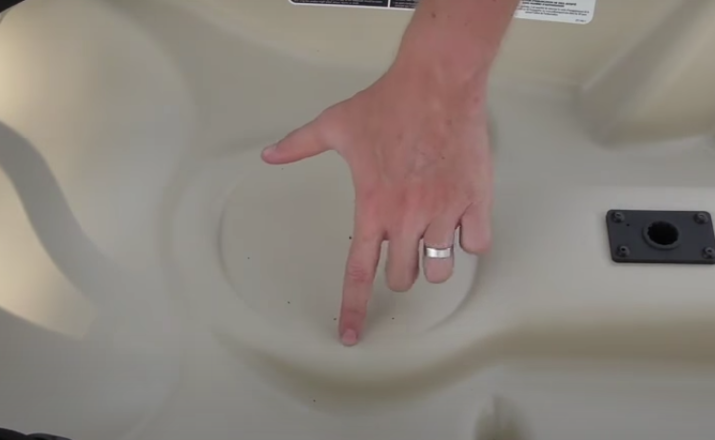
PC KayakDIY via YouTube
Your next step is to measure the area before you go shopping for a hatch installation kit. You will need to know the style of kayak hatch you want to install and have a good idea of the dimensions your hatch will be before you make a choice.
After the area is measured, you can go online or head down to your local kayak outfitter to find a compatible hatch kit.
The best kits will come with all of the hardware and components you will need for a full installation, but you may need to consult the installation instructions to see if you need to pick up any additional tools for the job.
Step 3: Mark The Hole You Will Cut
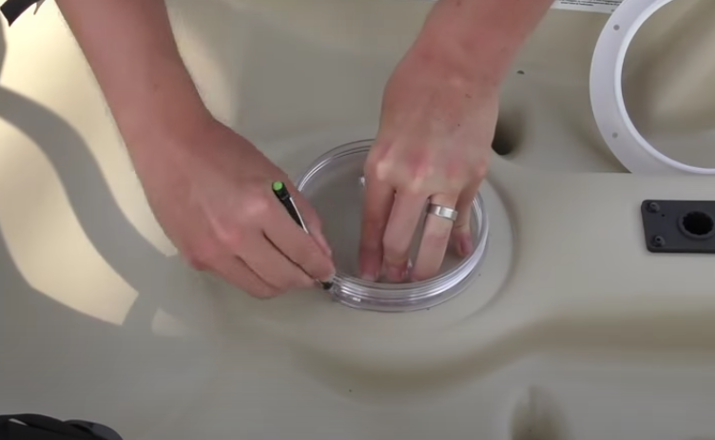
PC KayakDIY via YouTube
As the pros always seem to say, “measure twice so that you only have to cut once.” This is where things can get a little dicey if you are not particularly careful, which makes it really important to pay close attention to your kit’s installation instructions.
Most kayak hatches have both inside and outside dimensions. If you mark and cut your hole to the wrong dimensions, your hole will be too large and you will be forced to return the hatch kit and find one that fits.
If your hatch kit does not come with very detailed instructions, just know that you are always better to err on the side of measuring and cutting a smaller hole on your first pass. You can always make a second cut, but it is impossible to go back the other way.
Measure your hatch hole according to the shape of your kayak hatch and mark it with a pen or Sharpie. Be sure to make your mark very clear so that it is easier to follow it when it is time to cut.
Step 4: Cut The Hole
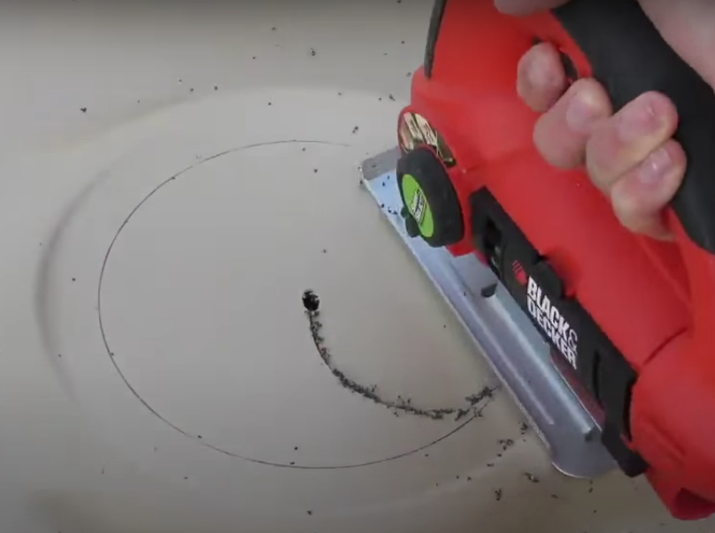
PC KayakDIY via YouTube
Now it is the moment of truth to open up your kayak and prep the hole for hatch installation. Before you go cutting into the deck of your kayak, it is worth double-checking that your marked hole is not going to cause you to cut through a bulkhead inside of your kayak.
If you find that this is the case, re-measure and re-mark before you proceed. Because many people use a reciprocating saw to cut through kayaks for hatch installation, it can be dangerously easy to cut through your bulkhead without even realizing it.
Once you are sure that your marked hole is clear of your bulkhead, follow your line to make the cut. After the cut is complete, come back with fine-grit sandpaper to smooth out the edges and eliminate any rough sections.
Before you install your hatch, this is also a great time to grab a vacuum and a sponge to clean out the inside of your newly-minted kayak hatch. Dispose of the section of plastic you just cut out and clean up any shavings around the outside of your kayak as well.
Step 5: Install Your Hatch
PC KayakDIY via YouTube
Now it is time to install your new hatch and the easiest way to begin with this process is to set it in place around the hole you just cut. This is another moment-of-truth and it will let you know how precise you were with your measurements.
If the fit is not as tight as you would like, now is the time to tinker with your hatch hole before you find out too late that it is not watertight. In certain cases, you may need to use polyethylene welding strips and a heat gun (or iron) to add plastic back to your kayak if your hole is ever-so-slightly too large.
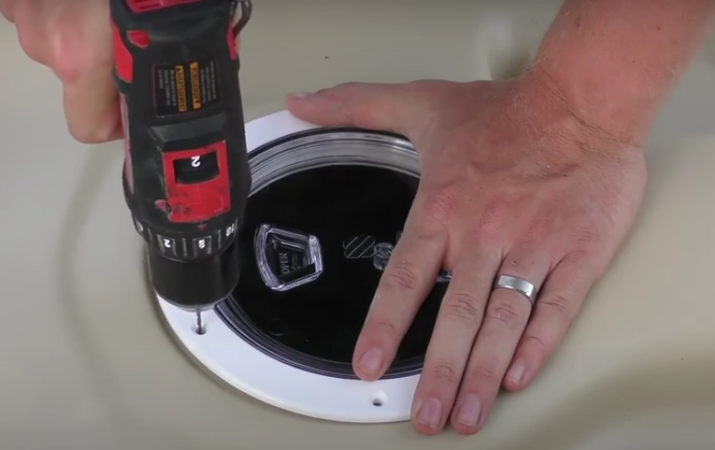
Assuming that you made accurate measurements and a fantastic cut, however, set your hatch in place and mark the holes with your Sharpie. Then remove your hatch and drill out the holes that you will eventually use to secure your hatch in place.
Once your holes are drilled, set the hatch back in place and install all of the screws or bolts that it came with. Lastly, you may need to put the hatch cover in place in order to complete the installation.
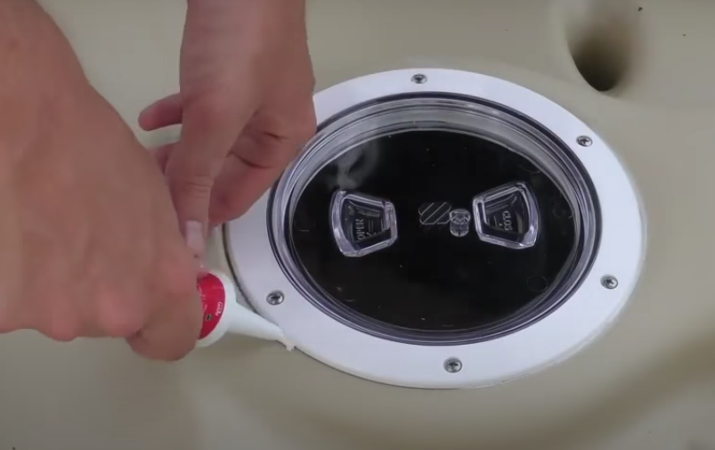
Step 6: Seal Your Hatch
PC KayakDIY via YouTube
Most quality hatch kits will come with some sort of rubber or neoprene washers that ensure the hatch remains waterproof once it is installed. If your kit didn’t come with these, I highly suggest installing them in place of whatever it did come with.
If you are still a little skeptical that your hatch is completely sealed to water ingress, you can take one more step to provide an additional level of protection. Using one of the best glues for kayak outfitting, apply a thin coat around the entire rim of your kayak hatch.
For a guaranteed seal, reach inside and apply a layer around the inside rim as well. If you do not want to get glue all of your hands and fingers, a large popsicle stick makes for a great tool for this last step.
Final Thoughts
Photo by Isabela66 via Shutterstock
Personally, I often find myself wanting for just a little more space in my kayak hatches when I am packing a kayak for an overnight camping trip. I’ve learned that larger hatch openings make it easier to fit larger dry bags inside.
Otherwise, you can be forced to separate your gear into smaller dry bags or strap one larger dry bag to your kayak’s deck (if you do not have a kayak deck bag that you can trust!).
We hope you have learned a lot from this ultimate guide to kayak hatches and you are more equipped to pick a kayak with the kind of hatches that will suit your preferences.
As always, we wish you the best kayaking adventures imaginable in the months and years to come!