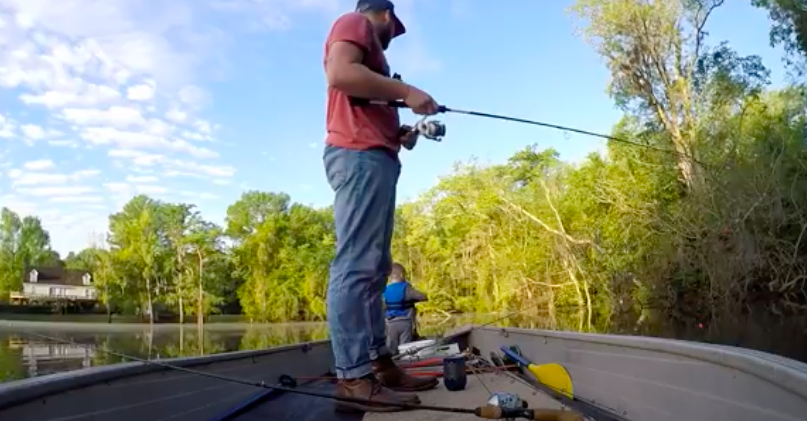
A casting deck is one of the most valuable additions you can make to your jon boat.
It provides a stable, elevated platform for fishing, keeps your gear organized, and transforms a basic aluminum boat into a more functional fishing vessel.
In this guide, I’ll walk you through the process of building your own custom casting deck that’s sturdy, functional, and tailored to your specific boat.
So let’s get started without wasting another minute.
Also Read: Free Boat Plans To Build This Week
Why Build a Casting Deck?
You can transform your basic jon boat into a more versatile fishing platform with a custom casting deck.
This not only improves your fishing experience but also adds functionality and value to your boat.
A well-designed casting deck can make even an inexpensive jon boat perform like a purpose-built fishing vessel.
Before diving into the construction process, let’s consider the benefits:
- Improved fishing position – standing higher gives you better visibility into the water
- More stable casting platform – a solid deck reduces wobble when moving around
- Additional storage space – the area beneath the deck becomes valuable storage
- Increased boat value – a well-built deck enhances your boat’s functionality and worth
- Personal satisfaction – customizing your boat to meet your specific needs
Explore: Free Kayak Plans To Build This Week
Materials You’ll Need
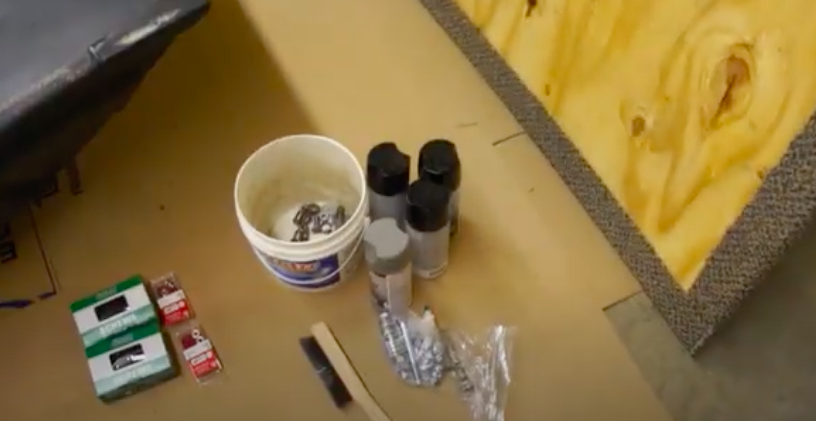
Gathering the right materials before you start will save you time and frustration.
This requires a combination of common tools, quality lumber, and marine-specific materials to ensure durability on the water.
Using marine-grade materials is essential as they’re designed to withstand the harsh conditions your boat will encounter.
- Measuring tape
- Pencil and paper
- Circular saw
- Drill with various bits
- Jigsaw
- Sander
- Level
- Screwdriver
- Hammer
- 2×2 lumber (for framing)
- 2×4 lumber (for supports)
- 1/2″ or 3/4″ marine-grade plywood (for the deck surface)
- Stainless steel screws (various sizes)
- Carpet or non-slip marine deck material
- Carpet adhesive (if using carpet)
- Marine-grade sealant/varnish
- Hinges (for storage compartments)
- Weather stripping (optional)
Explore: How To Customize A Kayak For Fishing?
Step 1: Planning and Measuring
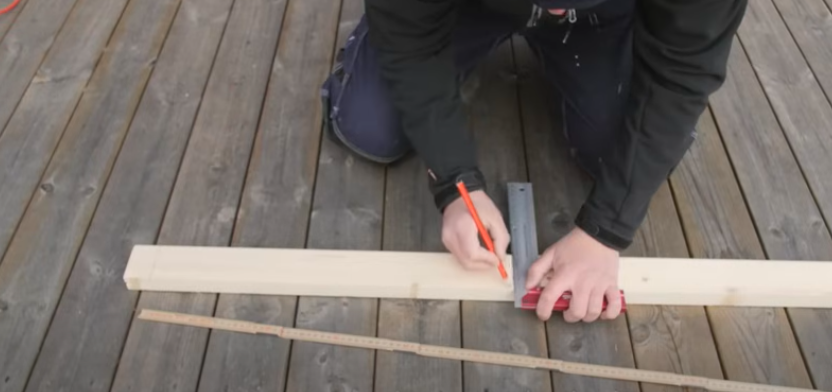
The foundation of a successful casting deck is careful planning and precise measurements.
This initial step is critical as mistakes here will multiply throughout the project.
Taking time to create a detailed plan will help you visualize the finished product and anticipate potential challenges before cutting any materials.
Before cutting any materials, carefully plan your deck design:
- Measure your boat’s dimensions – Width at the bow, width at the middle, and the length you want your deck to cover.
- Consider the boat’s contours – Jon boats aren’t perfectly rectangular, so account for any curves or angles.
- Plan for storage access – Decide where you’ll want hatches for storage areas.
- Create a detailed sketch – Draw your design with measurements, including support structures.
- Consider weight distribution – Ensure your design won’t make the boat unstable or too heavy on one side.
Keep in mind that adding weight to your boat will affect its performance and capacity. Try to keep your design as lightweight as possible while maintaining structural integrity.
Also Read: Easy & Affordable Boat Shed Ideas
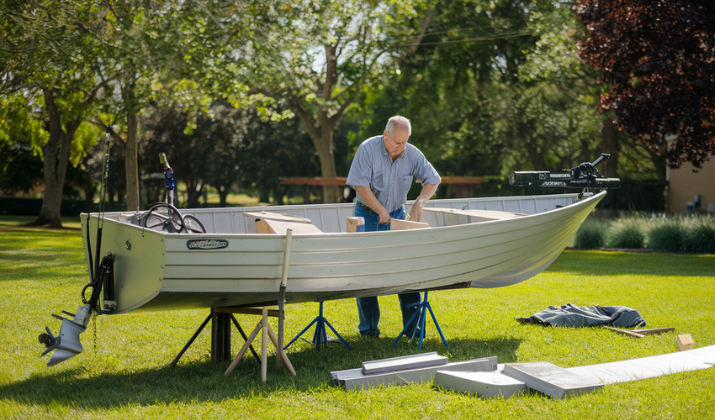
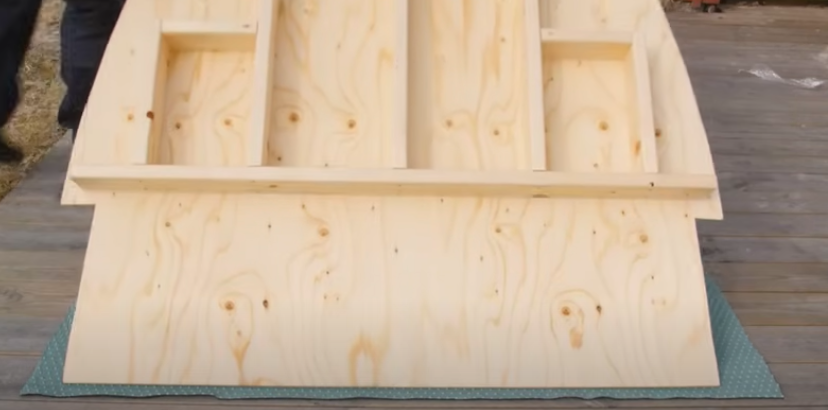
Step 2: Building the Frame
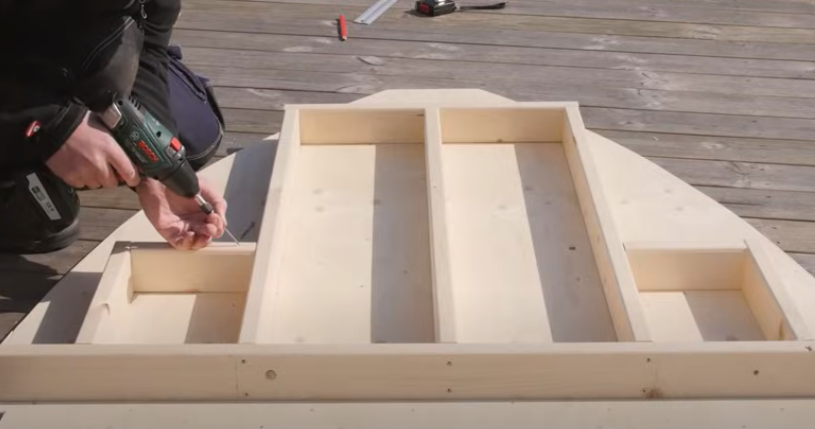
The frame serves as the skeleton of your casting deck, providing structural support and determining the deck’s overall strength.
A properly constructed frame distributes weight evenly across the boat’s structure, preventing stress points. The framework will ultimately determine how solid and stable your fishing platform feels when in use.
- Cut the perimeter supports – Use 2×2 lumber to create the outer frame that will sit on the boat’s ribs or gunwales.
- Add cross supports – Cut additional 2×2 pieces to create cross supports every 12-16 inches.
- Create any vertical supports – If your deck will be elevated significantly above the boat floor, cut vertical supports from 2×4 lumber.
- Test fit in your boat – Place the frame in your boat to ensure proper fit before proceeding.
- Make adjustments – Trim or modify the frame as needed for a perfect fit.
- Secure the frame pieces – Use stainless steel screws to connect all frame pieces.
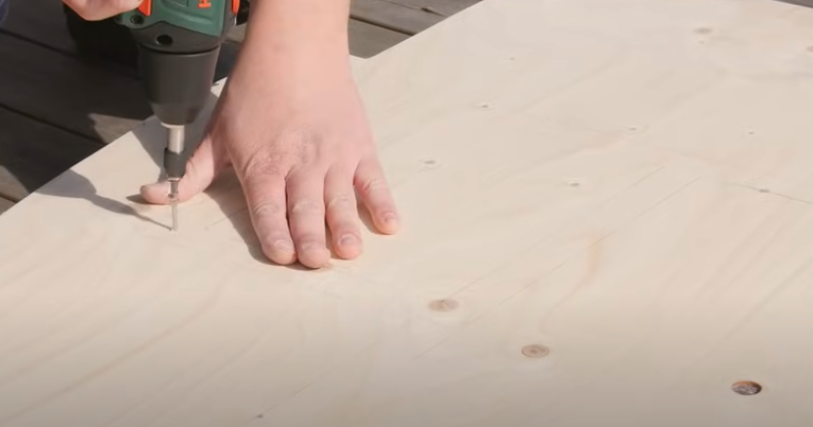
Step 3: Adding the Deck Surface
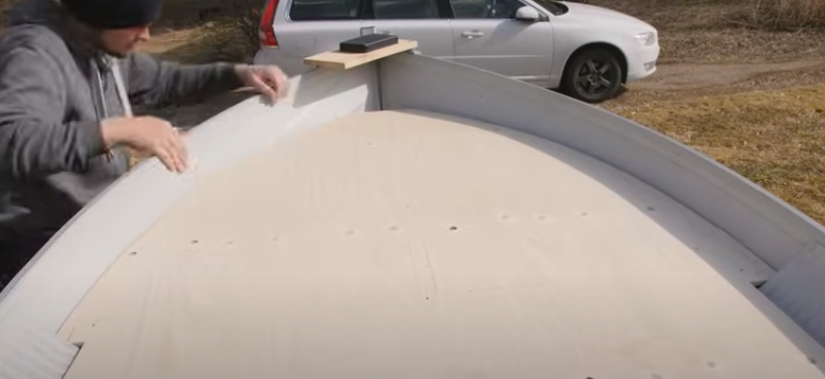
The deck surface is what you’ll stand on while fishing, so it needs to be both strong and lightweight.
Marine-grade plywood offers the best balance of durability and weight for this application.
Proper sealing of this material is essential as it will be exposed to water, sun, and changing weather conditions.
- Trace and cut the plywood – Using your frame as a template, trace and cut your marine-grade plywood to size.
- Test fit the plywood – Place it on the frame to ensure proper fit.
- Mark and cut storage hatches – Decide where you want access hatches and cut them out with a jigsaw.
- Sand all edges – Smooth any rough edges to prevent splinters and carpet fraying.
- Apply marine sealant – Coat all sides of the plywood with marine-grade sealant/varnish to protect from water damage.
- Allow proper drying time – Follow the sealant manufacturer’s instructions for drying time.
Check Out: DIY Kayak Trailer Ideas
Step 4: Creating Storage Compartments
Storage compartments underneath your deck maximize the utility of your boat by providing organized space for tackle, gear, and equipment.
Well-designed compartments keep items dry and accessible while on the water.
The hidden storage areas can dramatically increase the functionality of your jon boat without cluttering the deck space.
- Build hatch frames – Create frames around your cut-out hatch areas using 1×2 lumber.
- Cut hatch covers – Cut plywood pieces slightly larger than your hatch openings.
- Install hinges – Attach hinges to connect the hatches to the deck.
- Add weather stripping – Optional but recommended to keep water out of storage areas.
- Install handles or pulls – Add a way to easily open your storage hatches.
- Consider gas struts – For larger hatches, gas struts can help with opening and prevent slamming.
Check Out: Plywood Kayak Plans (With PDFs)
Step 5: Installing the Deck Surface
Properly securing the deck surface to the frame ensures a stable fishing platform that won’t shift or flex under weight.
This transforms your separate components into a unified structure. Attention to detail during installation will make the difference between a professional-quality deck and one that feels unstable or unfinished.
- Secure the plywood to the frame – Use stainless steel screws to attach the plywood to your frame.
- Ensure all screws are countersunk – This provides a smooth surface for your carpet or finishing material.
- Check that all hatches open properly – Make any necessary adjustments.
- Apply a final coat of sealant – For added protection before covering with carpet.
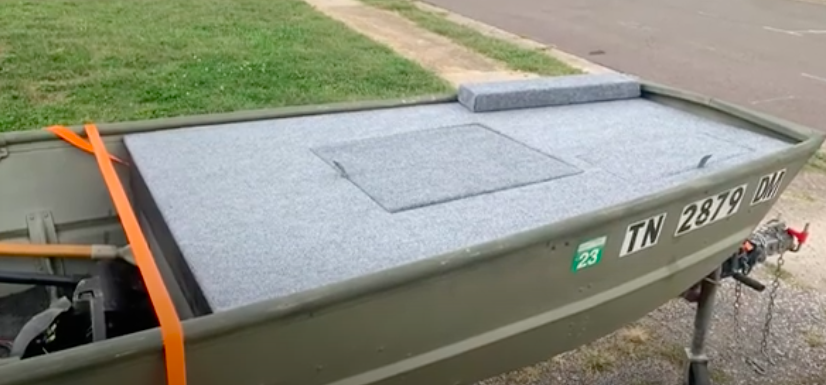
Step 6: Applying the Finish
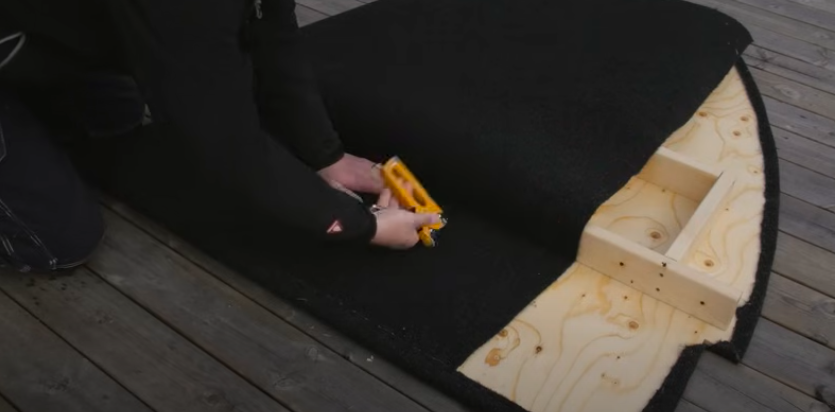
The finishing layer not only improves the appearance of your deck but also provides essential protection against the elements.
Marine carpet or specialized deck materials offer traction when wet and protect the plywood underneath.
A quality finish job extends the life of your deck and makes it more comfortable to use during long fishing days.
- Cut carpet or deck material – Allow extra inches on all sides for wrapping.
- Apply adhesive – Follow the manufacturer’s instructions for your specific adhesive.
- Carefully place and smooth the carpet – Work from the center outward to avoid bubbles or wrinkles.
- Wrap edges – Fold excess carpet over the edges and secure underneath with staples or adhesive.
- Cut openings for hatches – Carefully cut the carpet at hatch openings.
- Carpet the hatch covers – Apply carpet to the tops of your hatch covers for a uniform look.
Check Out: DIY Rock Holder Ideas
Step 7: Final Installation and Testing
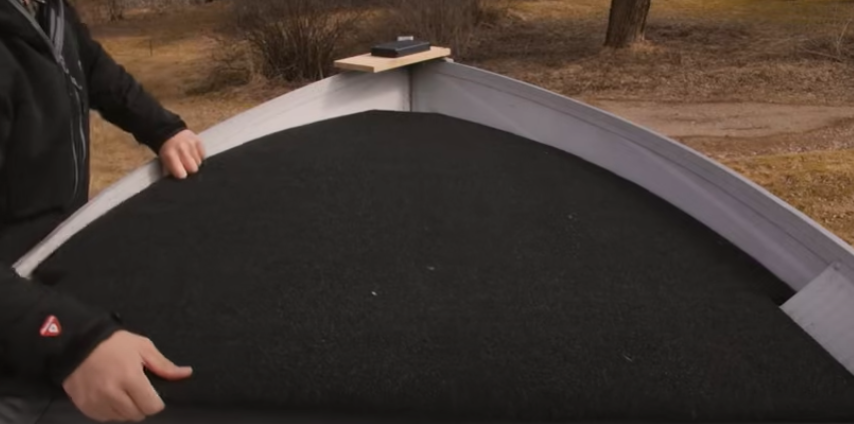
Once construction is complete, proper installation in your boat is crucial for safety and performance.
Testing under various conditions ensures your deck will perform reliably on the water.
The final phase validates all your previous work and gives you confidence in your newly upgraded fishing vessel.
- Place the completed deck in your boat – Ensure proper fit.
- Secure the deck to the boat – Use appropriate hardware to attach the deck to the boat’s structure.
- Check all hatches and storage areas – Make sure everything opens and closes properly.
- Test weight distribution – Place weight on different areas of the deck to check stability.
- Make any final adjustments – Address any issues before taking your boat on the water.
Tips for Success
Following these tips can help you avoid common pitfalls and achieve better results with your deck build.
- Keep it lightweight – Every pound matters in a small boat.
- Consider removing the middle seat – Many jon boat owners remove the middle bench seat to create a larger deck space.
- Use quality materials – This is no place to cut corners; marine-grade materials will last longer.
- Account for drainage – Ensure water can drain properly from your deck.
- Add rod holders and accessories – Plan for additional features like rod holders, cup holders, or fishing electronics mounts.
- Check local regulations – Some areas have restrictions on boat modifications.
Check Out: How To Build A Kayak Storage Shed?
Safety Considerations
Safety should always be your top priority when modifying a boat. The modifications you make can significantly impact how your boat handles on the water.
These considerations will help ensure your custom casting deck enhances your fishing experience without compromising safety for you or your passengers.
- Don’t exceed your boat’s weight capacity – Remember that your deck adds weight before you even add people and gear.
- Maintain proper balance – Ensure your design doesn’t make the boat prone to tipping.
- Secure all loose items – Design storage solutions that prevent gear from sliding around.
- Keep the center of gravity low – Avoid standing on elevated decks in rough water or high winds.
- Wear a life jacket – Always prioritize safety on the water.
Also Read: Canoe Plans To Build This Week
Maintenance
A well-maintained casting deck will serve you for many fishing seasons to come.
Regular inspection and maintenance prevent small issues from becoming costly repairs.
The practices take minimal time but significantly extend the life of your custom deck installation.
To keep your casting deck in top condition:
- Inspect regularly for water damage – Look for soft spots or discoloration.
- Tighten loose screws – Vibration from boat operation can loosen fasteners over time.
- Clean carpet regularly – Remove dirt, fish scales, and other debris.
- Reapply sealant as needed – Every few years, depending on usage.
- Address damage immediately – Small issues can become major problems if ignored.
Also Read: DIY Kayak Rack Ideas
Conclusion
Building a casting deck for your jon boat is a rewarding DIY project that can dramatically improve your fishing experience.
With careful planning, quality materials, and attention to detail, you can create a customized platform that meets your specific needs and enhances your time on the water.
Since each boat is different, use this guide as a starting point and adapt the process to your particular vessel.
Take your time, measure twice (or three times), and don’t rush the process. The result will be a professional-looking casting deck that will serve you well for many fishing seasons to come.
Happy building and even happier fishing!