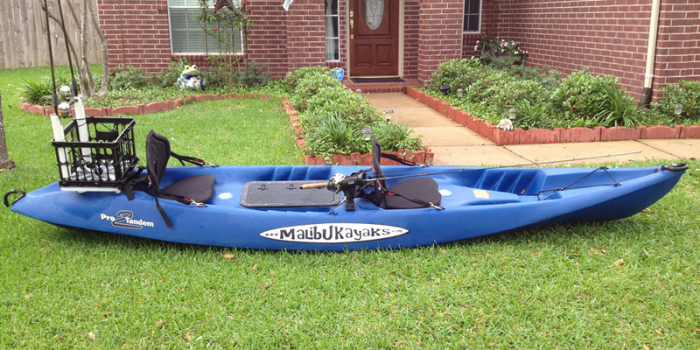
The best fishing kayaks usually come with a bunch of built-in rod holders so you can keep multiple setups ready at a moment’s notice. If you are customizing your own fishing kayak, however, it pays to know a few DIY kayak rod holder ideas.
Some of these are very basic and super affordable to do and others might require a little more time, skill, and investment. If it happens to be your fishing offseason, though, building and installing a few new rod holders for your kayak is a great way to upgrade your fishing kayak before you hit the water again.
Today, we are going to share five DIY kayak rod holder ideas that will save you from searching online to find a manufactured rod holder that’s compatible with your kayak. So let’s get started!
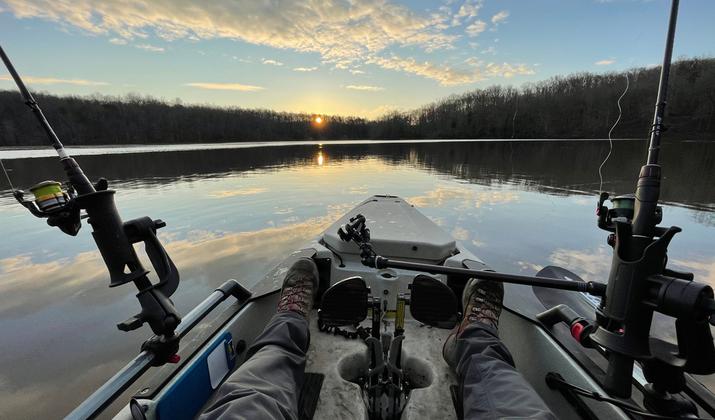
Photo by Passioneak via Shutterstock
Uses for Kayak Rod Holders
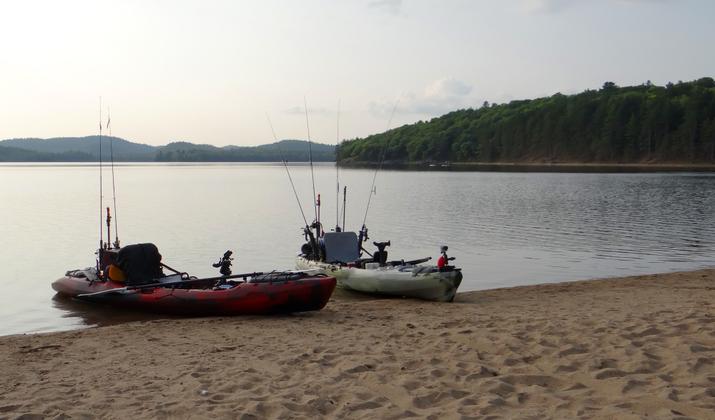
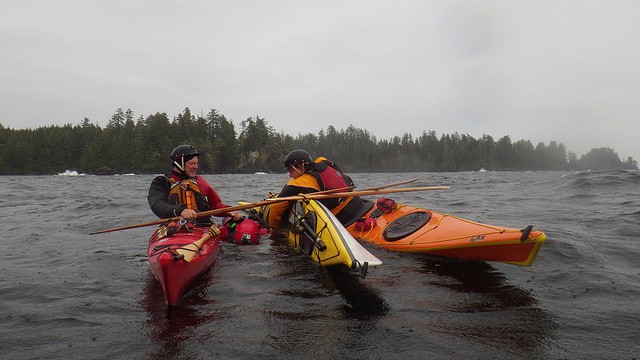
Photo by Mr.VIP via Shutterstock
The most obvious use for kayak rod holders is to hold your fishing rods when you are paddling. Or they can be used to hold extra fishing rod setups when you’re using a different one, but there are some other ways you can use a rod holder on a kayak.
Here are a few creative ways to make the most of your kayak rod holders:
- Securing a waterproof camera to film your fishing trips
- Holding the separate parts of an extra collapsible kayak paddle
- Installing a kayak light for evening or early morning paddling
- Holding a kayak flag for added visibility in busy boating channels
In fact, you could probably use DIY kayak rod holders for securing just about anything that will fit in them. That, of course, will depend on which DIY rod holder idea you ultimately go with!
Why Make a DIY Kayak Rod Holder?
Photo by AG’s photos via Shutterstock
There are many manufactured rod holders out there for kayaks these days, so it is logical to ask why you should make one instead of just buying one. Here are the major benefits of making your own kayak rod holder:
Customization
Only you know exactly what types of rod and reel combinations you want to carry and what other potential uses you might have for a DIY kayak rod holder. If you can’t find something online that matches your needs, making your own is the best way to go.
Expense
If you go with a super simple design that requires little more than a section of PVC, building your own kayak rod holder will be considerably cheaper than buying a manufactured model. You may even be able to build multiple for less than it would cost to buy a pre-made rod holder, which means you will have backups at your disposal whenever you (or one of your kayak fishing buddies) needs one.
Hobby
Are you bored sitting around and waiting for the weather to warm up so you can go kayak fishing again? Even if you never end up using it or you give it away as a gift, making a DIY kayak rod holder is a great way to pass the time until you can get out on the water again.
Rod Carrying Capacity
Whether you build a DIY fishing rod holder or add pre-made holders to your fishing kayak, you are going to expand your ability to carry a wider variety of fishing rods. This will make you more effective as an angler no matter what the fish (and the conditions) throw at you.
Plus, it allows you to fish with several different bait and tackle choices if you aren’t quite sure what the fish will be biting. You will also spend a whole lot less time finding new bait from your kayak tackle crate and rigging it up before you can start casting again.
Kayak Rod Holder Buying Guide
Photo by Aekchai Doungdee via Shutterstock
If you do not decide to build your holder, there are some important things to consider when shopping through manufactured designs. Here is a quick overview of what you should think about before you settle on a pre-made rod holder:
How Does It Mount?
The first thing to consider is how the rod holder will mount to your kayak. Your ability to add rod holders to your fishing kayak will largely depend on how many mounting locations it came with, or your willingness to drill into your kayak to create new ones.
Many of the most stable fishing kayaks have accessory tracks built into the gunwales. These tracks are compatible with most universal fishing rod holders that you can find online, but they also allow you to slide a DIY kayak holder into place if you get the right hardware.
Other kayaks, like Hobie, for example, include elevated rails on the gunwales of their kayaks. These rails are designed so that things like rod holders or a kayak GPS wrap around them to secure in place.
Rails are a little less common than accessory tracks, which means you’ll have a slightly harder time finding compatible rod holders if your kayak has them. Still, consider which mounting solution your kayak offers before selecting a pre-made rod holder.
Rod Holder Types
There are two basic types of kayak fishing rod holders: flush-mounted rod holders and swivel-mounted rod holders.
Flush-mounted rod holders are set into the deck of your kayak and, as their name suggests, the top is flush with the top of your kayak. These are a bit more difficult to replace, as some kayak manufacturers actually mold the plastic to create a rod holder, which means there’s nothing to remove and replace even if you wanted to do so.
They are also difficult to add to a kayak that isn’t made for them, as you can easily compromise your kayak’s flotation if you are not careful. Swivel-mounted rod holders, on the other hand, are much easier to replace as they are typically mounted wither in the center console of the cockpit or on one of the kayak’s gunwales.
These rod holders can pivot 360 degrees to allow you to troll or drag off either side of your kayak. They are also useful if you are reeling in bigger fish, as they can help you stabilize your rod as you reel.
DIY Kayak Rod Holder Ideas
Now that you know what to look for in a rod holder, let’s evaluate these five DIY kayak rod holder ideas that can help you meet your needs without overpaying.
1. Cooler Attachments
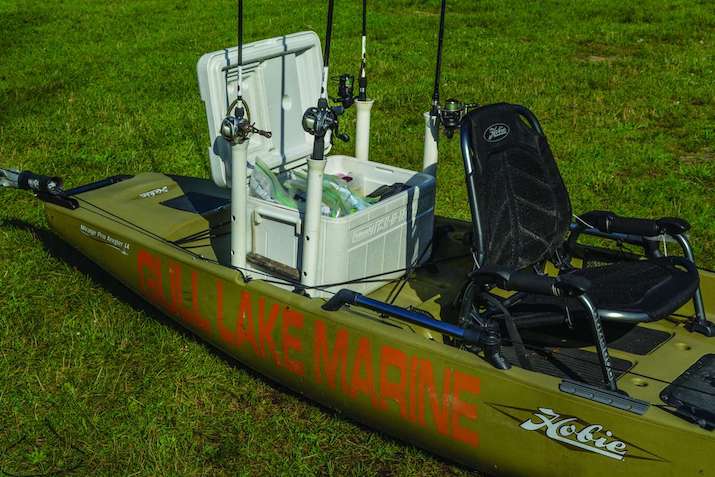
PC Bassmaster.com
If you already have a kayak cooler that you place in the stern storage area of your kayak, then this is a great DIY rod holder solution for you. You can basically install as many extra rod holders as you like, as long as they don’t interfere with your ability to open and close the cooler.
To make these attachments, you’ll need to find a section of PVC pipe that you can attach to your cooler’s exterior. Ideally, look for PVC with flared tops that will allow your rods to flex slightly if you are using them for trolling.
If you can’t find PVC with tops that are already flared, you can create your own flares. To do so, you can heat up the end of the PVC with a heat gun and then place it slowly down over a wine bottle to flare the end of the PVC pipe.
You’ll also need to use some sort of backing strip (treated wood or HDPE will work) between the rod holders and the side of your cooler. This moves the rod holders slightly away from the cooler so that the lid clears the flared tops when opening and closing it.
The major challenge of this approach is drilling straight holes through the PVC pipes. Drilling a minimum of two quarter-inch holes should do the trick, but you may need to place the pipe in a vise with your backing strip beneath it to hold it still so you can drill straight through the pipe and the backing strip.
Depending on your bolt choice, you may need to open up your original quarter-inch holes up to a half-inch in diameter so the bolt head will fit through the pipe. Once your holes are drilled through the PVC and backing strip, place it on your cooler where you intend to install and then drill through the cooler.
Finally, install your bolts with a flat washer and a lock washer on the inside of the cooler. Use marine-grade silicone or one of the best kayak glues to seal around the ends of the bolts inside your cooler to complete this DIY rod holder design.
You can use this method to install as many rod holders on your cooler as you like, but we do recommend using this method on cheaper coolers. They will be easier to drill through and cheaper to replace if you mess things up on your first try.
2. Milk Crate Rod Holders
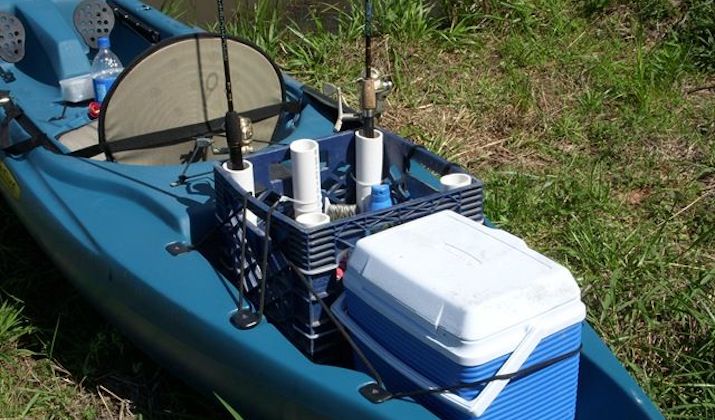
PC Wide Open Spaces via Pinterest
If you don’t use a cooler in the rear storage area of your kayak, a milk crate is an excellent alternative. Of course, it won’t offer an insulated place to keep beverages or store fish after you catch them, but it can be used for tackle boxes and other miscellaneous kayak fishing gear.
The major benefit of using a milk crate for kayak storage over a cooler is that it’s much easier to add rod holders to a milk crate. Using the same pieces of PVC pipe we suggested for the cooler attachments, you can add rod holders to the interior or the exterior of a milk crate.
Attaching them can simply be done with several heavy-duty zip-ties around the PVC and then through the crate itself. If you are having problems with your rod holders sliding up or down, you can also drill a hole towards the bottom and thread two zip-ties through the hole and then around the outside of the PVC and through the milk crate in opposite directions.
The nice part about this design is that you can choose the height of your rod holders. If you want your milk crate to remain stackable, install PVC rod holders that are just shorter than the depth of your milk crate.
You will also have the freedom to install up to eight rod holders on the interior of a standard-sized milk crate if you choose this DIY kayak rod holder idea. It’s not recommended to install more than that to allow some space for the reels not to hit each other if the rods spin in the holders.
If you are installing PVC rod holders on the outside of a milk crate, you might be able to add a couple more with the extra dimensions you’ll be working with. However, you will need to make sure you don’t extend the sides of your milk crate so far that it no longer fits in the stern storage compartment on your fishing kayak.
If you decide to go with this DIY kayak rod holder idea, you will be best to start with evaluating the right type of milk crate to add. So here are five of the best kayak milk crate ideas!
3. Extended 45-Degree DIY Rod Holders
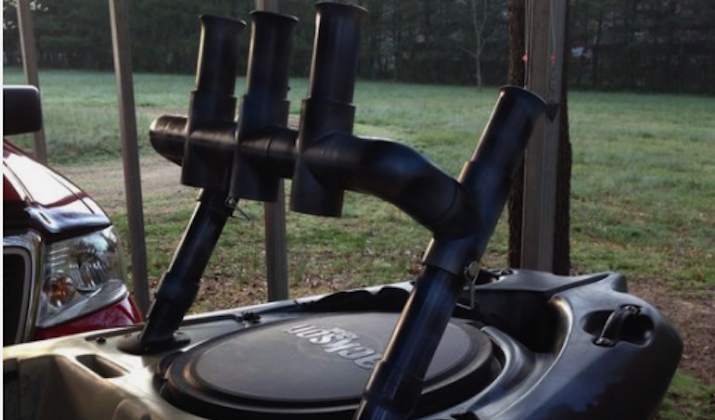
PC Johnnie Lakey via Pinterest
A good way to utilize the existing flush-mounted rod holders on your fishing kayak to add more rod carrying capacity is to utilize this PVC design. You’ll go from having two rod holders to five and they’ll be positioned a bit higher for easier access from your kayak seat.
This is also a good solution if you have an enclosed rear storage hatch on your fishing kayak because you will still be able to access that hatch with your DIY rod holders installed.
To start this design, you will need to measure the diameter of the existing flush-mounted rod holders on your kayak. That measurement will tell you what diameter the PVC needs to be that will insert into these rod holders.
From there, you’ll need two T-connectors, two 90-degree connections, and three X-shaped connectors. You will also need approximately 10 to 15 feet of PVC pipe that you’ll eventually cut down to the appropriate lengths to complete your design.
You may also need connectors that allow you to insert a smaller section of PVC into a section with a larger diameter. This will allow you to insert the smaller section into your flush-mounted rod holders and then utilize PVC with a larger diameter that will actually fit your rod ends.
Diagram this DIY kayak rod holder before cutting down the PVC into appropriate sizes to avoid wasting materials. Also, put everything together to make sure it fits as expected before taking it apart and using PVC glue at all the connection points to finalize this design.
4. Rear Extended Vertical DIY Rod Holders
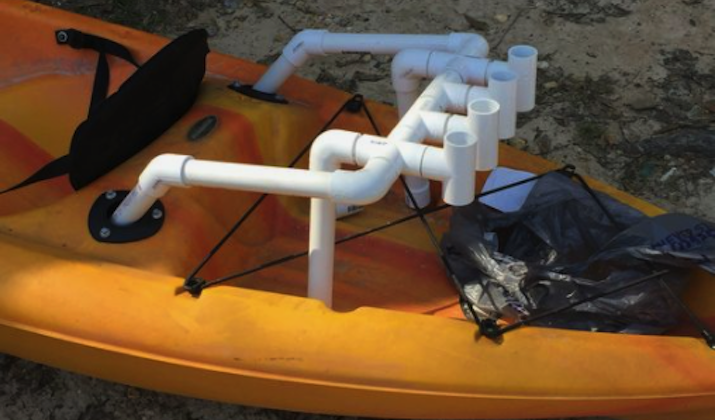
PC Gary Deen via Pinterest
Like the last design, this one also utilizes the existing flush-mounted rod holders on your fishing kayak. It will also require two scupper holes in the stern storage compartment of your kayak, so if you don’t have scupper holes back there, this one won’t work for you.
The main benefit of this DIY rod holder idea is that you’ll be able to fit a small kayak cooler bag or tackle box between your extra rod holders and your kayak seat. So adding two additional rod holders won’t eliminate your ability to utilize the rear storage space on your kayak and it will also make it easier to get to whatever you store back there.
Another benefit of this design is that it has two additional mounting points that will keep your rods more secure. This can come in handy in windy conditions or if your rod tips accidentally come in contact with a low-hanging tree branch while you are paddling.
This also means that less water will come up through your scupper holes and into that rear storage compartment when your kayak is loaded down with all of your fishing gear and safety equipment. The downside of that is that water will drain less effectively if it splashes over the edges of your kayak or falls as rain in this compartment.
Considering those pros and cons, this DIY kayak rod holder is also a PVC-based design, but because it’s a little more extensive, we recommend starting out with somewhere between 15 and 20 feet of PVC to make it happen.
Of course, you’ll need to measure the diameter of your flush-mounted rod holders and your scupper holes to make sure you choose appropriately-sized PVC sections for the base of this design.
From there, you’ll need a minimum of two 45-degree connectors, four 90-degree connectors, two X-shaped connectors, and six T-shaped connectors. You may also need connectors to help you insert PVC sections with smaller diameters into larger diameter sections.
Note: You may avoid inserting the rear vertical arms of this design into your scupper holes if you desire. If you choose this route, those vertical arms will simply rest in your kayak’s rear storage area and the ends should be capped to prevent water ingress.
Just like the previous design, be sure to diagram this rod holder out completely before making any cuts to your original lengths of PVC piping. Then assemble everything and make sure it fits in your kayak as you want it to before you glue anything together.
5. Extended DIY Rod Holders + Outriggers
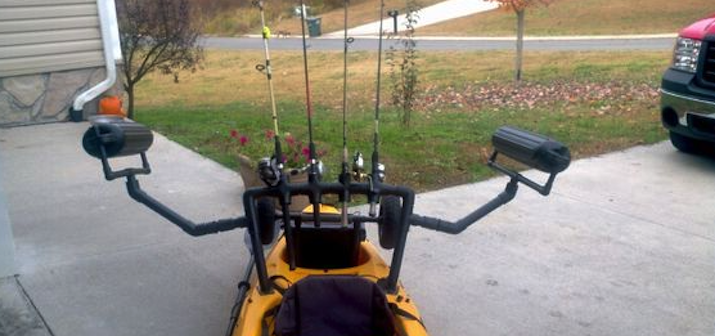
PC Peter D via Pinterest
If you can’t find yourself one of the best fishing kayaks for big guys and gals, adding stability to your kayak can be a big deal if you are a larger paddler. Fortunately, this design accomplishes just that, while also adding two additional fishing rod holders to your setup.
It is also a PVC-based design that inserts into the existing flush-mounted rod holders, but this one includes outriggers that can spin up (as pictured above) or down to sit on top of the water and provide extra stability when you’re reeling in a big fish.
That is a nice feature because you might want to spin them up when you’re paddling, but have them down for stability when you’re fishing. The outriggers themselves are made from repurposed boat buoys, i.e. the kind you place over the edge of your boat to protect it from making direct contact with the dock.
The rest of the design is all PVC, and you’re probably going to need to start with a minimum of 25 to 30 feet of PVC piping to make this DIY kayak rod holder and outrigger design come to fruition.
Again, it helps to diagram it out before you even purchase any supplies to make sure you’re only making one run to your local hardware store. In addition to the PVC, however, you’ll need about four X-shaped connectors, two 90-degree connectors, and two T-shaped connectors to assemble the main portion of these rod holders.
The outrigger arms will require two 45-degree connectors (each) and then the section of PVC that are used to hold the buoys in place are actually a smaller diameter than the rest of the structure.
So you’ll need a step-down T-shaped connector, two-90-degree connectors, and end caps for each of the outrigger arms to complete your DIY kayak rod holder and outrigger design.
Final Thoughts
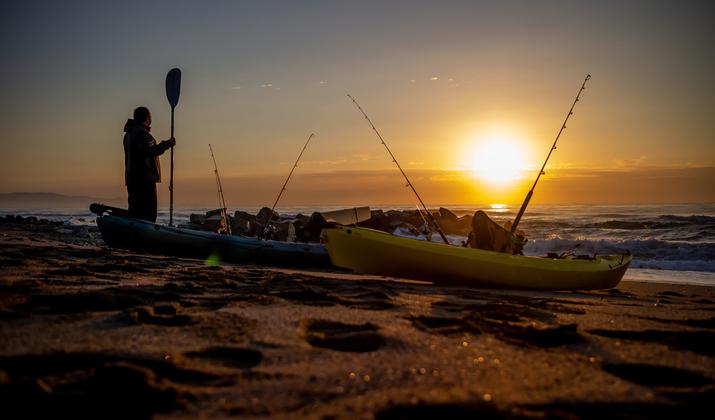
Photo by Robalito via Shutterstock
Don’t hesitate to come up with your own design if you are not quite thrilled with any of these. Only you know exactly how and where you plan on using your fishing kayak, which means you are the best person to design and build your own DIY kayak rod holder!